What can lovely ladies come up with to look bright, beautiful and unique? Among the huge selection ready-made jewelry and accessories, many fashionistas prefer to create incredible creations themselves and proudly display them. Kanzashi from satin ribbons for beginners are just such a creation.
One of the first to decorate themselves with their own hands were Japanese women. They also became the progenitors of the art of kanzashi - the technique of creating flowers from silk. Residents of the Land of the Rising Sun decorated their hairstyles with flowers, which they made themselves from natural silk.
Methods of working using the kanzashi technique have become very popular all over the world. Needlewomen use the basics of kanzashi not only to make hairpins with flowers and leaves, as originally intended, but also to create paintings and canvases, figurines of animals and birds, voluminous topiaries and trees.
The materials and tools that craftswomen worked with in past centuries in Japan have also undergone changes. Previously, only noble and rich houses could use natural silk as the basis for kanzashi flowers, and all the parts were glued to each other using rice glue.
Now available to fashionistas various types fabrics, tapes, as well as all kinds of methods for fixing and gluing workpieces - using ordinary glue, a soldering iron, a lighter, threads and needles, liquid nails, etc.
One of the simplest, lightest and most inexpensive materials for creating kanzashi products is satin ribbon. This is the most successful fabric for beginning needlewomen. It is easier to cut it into even squares, and the edges are easier to singe over the fire.
In this article we will look at several master classes on working with the kanzashi technique from satin ribbons for beginners. Let's make a hairpin and learn how to make a swan.
Ribbon hairpin
For work, you will first need satin ribbons of any color, 5 and 2.5 cm wide; glue, or better yet, a glue gun; source of fire - lighter, matches, candle; cardboard; hairpins; beads or rhinestones for decoration.

1) The first step is to cut even squares from the ribbons.

2) We start working with large squares - fold a piece of fabric diagonally so that the wrong side is on the inside.

3) Fold it in half again.

4) And fold it again, and in the end you should get a sharp petal.

5) Now you need to fix it, for which, holding the part with your hands, we cut off the folded corners by a few millimeters.

6) Solder the cut area above the fire, the petal should be fixed.

7) In order for the petal to look smooth and neat, you need to cut off the corner at the base and also scorch it with fire.

8) The petal is ready, you need to saddle 5 more pieces according to the indicated pattern.


9) Now let's start working on the small petals. It is necessary to repeat the first two previous stages and fold the square in half twice.


10) After this, you need to bend the corners to the sides and also fix and scorch the base using fire.

11) Prepare the base for the hairpin - cut out two even small circles from cardboard.


12) The cut out circles should be wrapped in a piece of satin ribbon and the fabric should be secured on the back side.


13) Carefully glue the petals to the base using a glue gun.

First, large sharp petals are glued.
14) Small petals are carefully placed inside the large petals and glued.

15) It is better to decorate the center of the flower with rhinestones or beads, also gluing them with glue.

16) The hairpin is ready, all that remains is to glue the created creation to a metal pin or clip.


Swan Kanzashi
Having examined the method of making petals step by step, you can make a wonderful home decor - a swan from satin ribbons. Creating this creation will require perseverance and patience, but the result will exceed all possible expectations.
1) To work you will need: satin ribbons in white, red and black; scissors, fire source, glue gun and wire, white knitting yarn.
2) Firstly, it is necessary to create a basis for the future swan, for which we will make a frame from wire and wrap it with yarn.

3) Use red yarn to highlight the beak, and use black thread or a piece of black satin ribbon to decorate the eyes.


4) Then the most painstaking and lengthy work begins - you need to make large number white petals according to the pattern described earlier, and then, starting from the head, stick them from top to bottom to the base of the neck.
5) We will make wings from wire and yarn and glue or connect them with wire to the swan’s body.


6) Next, we glue the petals again; it is best to approach the process of decorating the swan individually, that is, select the details so that the swan looks natural, and the petals look like smooth and even feathers.

7) If large petals look scanty, then you can put smaller pieces in them - as discussed above.


8) Surprisingly, in this master class there is no specific final stage - the figure can be considered finished when your imagination dictates. If the swan has a bushy tail, then it is necessary to glue more petals; if the wings are small, then it is enough to glue several petals in one layer - it all depends on the desire and imagination of the needlewoman.


Video on the topic of the article
Even more videos and master classes on the technique of kanzashi satin ribbons in the following videos
In spring and summer, every girl wants to be attractive. Not only the image as a whole plays a big role, but also individual details: shoes, elastic bands, invisible ones. To keep your hair in order and your hairstyle to look neat, you should use not only hairpins, but also hair clips. It's not difficult to make them with your own hands. The process is fun and does not take much time.
Little children enjoy making crafts beautiful hairpins for hair with your own hands. This is a great way to stand out, because you won’t find similar products anywhere else. There are many ideas and ways to make hairpins. Simplify the task modern materials, which are presented in a wide range in stores.
Types of hair clips can be different. Satin, velvet, light chiffon, and crepe-satin are suitable for the creative process. A twister for a hairstyle or bun should be made of dense, soft material. Fabrics with prints look interesting: flowers, figures. It is necessary to choose threads that match the color of the product, otherwise the design will not look beautiful. You can buy ready-made ribbons at a fabric store. They are easier to work with: they are already processed around the edges.
A base will also come in handy. It is better to take metal left over from old products.
Using a special glue, the decoration itself will be applied to it. Invisibility designs are also suitable. You can even use regular hairpins.


Made from fabric
Children's hair clips made from ribbons are the most quick way stand out and add charm to your image. You will need:
- ribbon 5 cm wide in one color;
- ribbon 2.5 cm wide in a different shade;
- threads, needles;
- bead;
- automatic base;
- glue "Moment".
Now you can begin the process itself.

Instructions

A hair clip is made from satin ribbons. Now you can safely wear it. There is another option.
From rep ribbons
They have a suitable structure and a wide range of colors. Products with bright shades are suitable for children: they look original and do not tangle the hair.
You will need:
- tapes 10 mm and 22 mm long. It is better to take them in different colors;
- scissors, thin fishing line, thread, needles, lighter;
- basis for the product;
- strong glue.

Instructions
- First you need to decide on the designs. To do this, the ribbons should be folded in the shape of a flower or a bow. Then you need to choose the size. The length and width of the entire structure depend on it.
- Once the dimensions have been selected, you need to cut the tapes. In this case, it is advisable to leave a margin of 2-3 mm. The edges must be burned using a lighter or match.
- The ends of the ribbons must be connected using fishing line and a needle.
- Carefully secure the thread in the center and wind the tape well with it. You will get a bow.
- Then you need to take another smaller tape. It is wrapped over the base. Anything unnecessary should be removed.
- You can glue or sew rhinestones, a bead, or a button into the middle. Then the entire structure is connected to the base.


From scrap materials
You can make beautiful bobby pins for your hair or bun using available tools that are always available in any home. Even bumpits can be made this way. Below are some popular and unusual options.

For high styling
Formal hairstyles require special decorations, so ordinary bobby pins will not work here. You need bumpits for volume hair, as well as wedding clips for a spectacular hairstyle. If you show your imagination, you can create an original hairpin that no one else will have.

So here you go unusual option. Suitable for both bun and other styling:
- You need to prepare materials: fabric that can hold its shape, flexible and elastic fishing line, dry glitter, glue, threads and needles, a base for the invisible.
- It is recommended to use a hard standing fabric, otherwise the invisible petals will lie unsightly. You need to cut several of these petals. Each of them can be processed along the edges so that the fabric does not fall apart.
- It's fun to create pieces of fishing line with glitter. To do this, each piece needs to be dipped in glue, and then in dry glitter. Only the tip of the fishing line needs to be dipped in glitter. The ends of the wire should be shiny. You need to cut several of these pieces.
- Now the fishing line and petals need to be securely connected to each other. To do this, pieces of fabric are sewn or glued onto the base, and pieces of fishing line are inserted into the middle. This can be done in several ways, but it is better to make a ring at each end of the fishing line, which is then easily sewn to the workpiece.
1. SELECTION OF HAIR CLIPPERS FOR DECORATION IN KANZASHI STYLE
In this material we continue to introduce you to unique technology making crafts to decorate women's hair accessories . You will learn how to choose the right hairpin to secure your hairstyle or stylish evening hairstyle. You will also find here instructions for beginners, with which you can make beautiful flowers in the kanzashi style with your own hands and decorate hair clips with them.
Recently, many craftsmen who specialize in making crafts using the kanzashi technique , they choose hairpins and elastic bands as objects for decoration. A hairpin with an elegant flower made of satin ribbons will serve as a wonderful accent for stylish styling and blend in with an elegant dress.
Many women have a wide variety of hairpins and headbands in their arsenal. , crabs and elastic bands, decorated with flowers made of ribbons, butterflies made of fabric, bows.
You don't have to buy expensive ones exclusive hair accessories With. You can make original, unusual and, most importantly, decorative hairpins that are just right for you with your own hands. To do this, you need to prepare satin ribbons of different colors, tweezers, glue and an inexpensive automatic hairpin as the basis for decorating the kanzashi.
Before moving on to the master class for beginners on making flowers from ribbons and decorating hairpins, let's take a look at the tips for choosing these hair accessories.
4 important tips for choosing hairpins:
before purchasing hairpins that you will use as a base for decor in kanzashi style , be sure to check their functionality and strength;
Hairpins can be made of different materials. The most popular are plastic, metal, leather.
But low-quality metal hairpins can injure the skin on the head and deform the hair structure. Therefore, choose metal accessories with a rubber insert;
If you have short haircut, then the most suitable would be a small hair clip (which is best decorated with bright flowers from satin ribbons ). For thick and long hair, it is better to choose a large hairpin;
One of the best and most modern options is automatic hairpin. This accessory can be quickly put on your hair, fixing the strands in the desired position. There are many ways to decorate an automatic hairpin in an original way with crafts. self made from silk or satin ribbons. When choosing the colors of the ribbons from which you will make kanzashi decorations, consider combinations with the colors of clothing, shoes, and handbags.
2. MASTER CLASSES FOR BEGINNERS. WE MAKE STYLISH FLOWERS TO DECORATE BARRIERS
In previous materials, we told you about how to correctly make round and sharp petals for kanzashi flowers, and also posted master classes for beginners - how to assemble a flower from different petals, decorate a hairband with flowers.
In this article you will find a MK with the technique of making individual flowers and making compositions from them , suitable for decorating automatic hairpins.
In order to firmly glue the decoration to the hairpin, you must first glue a strip of satin ribbon to the outer part of the base (with super glue). You can glue flowers from pieces of tape onto this strip using hot silicone glue.
Master class 1
Step-by-step training with photos. How to make flowers using the kanzashi technique with sharp petals and curls. Very beautiful decoration for an automatic hairpin or for an elastic band:
CLICK ON THE LINK FROM MK.
Master class 2
How to do beautiful crafts in kanzashi style made of satin ribbon in blue and black colors. Several options for crafts for hairpins - flower, dragonfly, butterfly:
CLICK ON THE LINK WITH PHOTO LESSON.
Master class 3
Another manufacturing option original decoration for pinning kanzashi. How to properly make flower petals from fabric and put them together:
The final stage of creating the image of a young fashionista is the hairstyle, including decorating the hair with a hair clip. However, very often we are faced with the fact that nothing offered in the store is combined with the unique and inimitable image in which we would like to appear today. The way out of this situation is simple - you can make a hairpin with your own hands. Of course, it will take some time, but the result is worth it!
How to make a hairpin from ribbons?
There are many options for creating a hairpin with your own hands - you can make a decoration from beads, from valuable stones, from fabric, from scraps of leather, but you never know what you can make! The imagination of young fashionistas has no limits. We will offer you a simple and economical way - we will make a hairpin from ribbons.
To make a hairpin from ribbons with your own hands, we will need the following materials:
- satin ribbon 5 centimeters wide, brown;
- satin ribbon 2.5 centimeters wide, brown with polka dots;
- threads with a needle of light colors;
- bead, preferably small white;
- automatic hairpin;
- glue moment;
- scissors.
Ribbon hairpins: master class
So, having prepared everything you need, let's get to work:
1. Take a brown polka dot ribbon and cut it into strips 7 centimeters long.

2. Then fold the piece of tape at an angle of 90 degrees so that the distance from the edge of the tape to the corner is equal.
3. This is what the ribbon looks like folded from the back.

4. Now we string the resulting petal onto a needle and thread.

5. In the same way, we string four more petals, carefully and evenly pulling them together. As a result, we get the first flower.

6. Let's make exactly the same flower from a brown ribbon of greater width.

7. Glue the flowers onto the pre-made base. The base is made simply by covering a circle of cardboard with a piece of fabric of the same color from which the flower is made.

8. Now let's make the second type of petals. For a visual example, we used a white ribbon; for the master class, the petals are made from brown polka dot ribbon. Cut the tape into pieces 5 centimeters long. One piece makes one petal.

9. Using a soldering iron and a ruler, solder the corner; if it is not possible to work with a soldering iron, you can sew the corner with a small seam, then trim off the excess fabric, but this should be done very carefully, without pulling the fabric. We fold the tape lengthwise with the wrong side inward. The cut corner turned out very sharp. Let's take note that the sharper the corner, the smoother the petal turns out. In the master class we got an angle of almost 30 degrees.

10. Straighten the petal, bend the corners towards the center. Melt the edge with a lighter or soldering iron.

11. Let's make six petals of this design.

12. Then we sew the resulting petals together in three pieces, stringing them on a needle and thread.

13. Now that all the elements of the fabric hairpin are ready, let’s begin assembling the decoration. First of all, we glue the flowers - first a large brown one strictly in the middle of the automatic hairpin, then we glue a smaller polka-dot flower onto it. We glue it in such a way that the tops of the petals of the smaller flower are located between the petals of the larger one, and glue a bead in its center. Then we glue small sharp petals on the sides.
14. The hairpin is ready!
 DIY ribbon hairpins with photo tutorials
DIY ribbon hairpins with photo tutorials
Recently, it has become popular to make hairpins from ribbons with your own hands, as well as elastic bands and braid braids with ribbons. In such needlework, the tsumami kanzashi technique made from satin ribbons helps. Our master class, as well as video lessons, will be devoted to creating hair jewelry in the Tsumami Kanzashi style. 


Making a hairpin from ribbons
We will start our master class with creating kanzashi hairpins for beginners. To do this, we need the following accessories, namely:
- pieces of satin ribbons, grosgrain ribbons, orange and white;
- decorative material in the form of a rosette and black beads;
- scissors;
- textile glue;
- fire from a candle or lighter;
- simple hairpin.
The pattern for creating a hairpin is simple. Take the tapes and put markings on them with a simple pencil, size 5 by 5, in the amount of 16 pieces. We do the same procedure with white tape. Cut everything into squares and pour fire over candles or lighters so that the threads do not unravel, and you can make tsumami kanzashi. Look at the photo, this is what you should get. 

For such a hairpin, we will make pointed petals. This technique is very common and you can easily find it in videos on the Internet.
A pointed double petal, let's make it orange, inside it, there will be white. Take the orange square and bend it diagonally, then once more and pour fire on the corner. Fold the white blank also diagonally, only three times. Look at the photo to see what happens. 


Attach the white blank to the orange one and make a petal. Remove the end and excess material and scorch with flame. We should have 16 such elements.
To decorate the hairpin, we need a few more simple single-layer blanks. From a piece of tape, do exactly the same actions that we did above in the text. 
Simple pointed petals are made in the same way as two-layer ones. Let's not repeat ourselves so as not to waste time. This process can be seen in the video or photo in the text. 
We need twelve pieces of such blanks.
Our master class continues, and we begin to make the main part of the hair clip with our own hands. Cut out a circle with a diameter of 3.5 cm from thick cardboard and stick tape on it. In the end, such an element should be formed. 
Now we move on to connecting all the elements together. Take the double pointed petals, and after smearing them with glue, attach them to the round base. We do this in a circle. Do this technology, clearly along the edge, attaching all the petals tightly. This is what the first tier of the flower should look like, as shown in the photo. 


Next, you need to cut out another circle with a diameter of 2.5 cm and also cover it with satin. Then, in a circle, glue simple petals. In the end, you should end up with a do-it-yourself piece using the tsumami kanzashi technique. 


This small flower must be coated with glue on the reverse side and carefully glued to a large bud. 
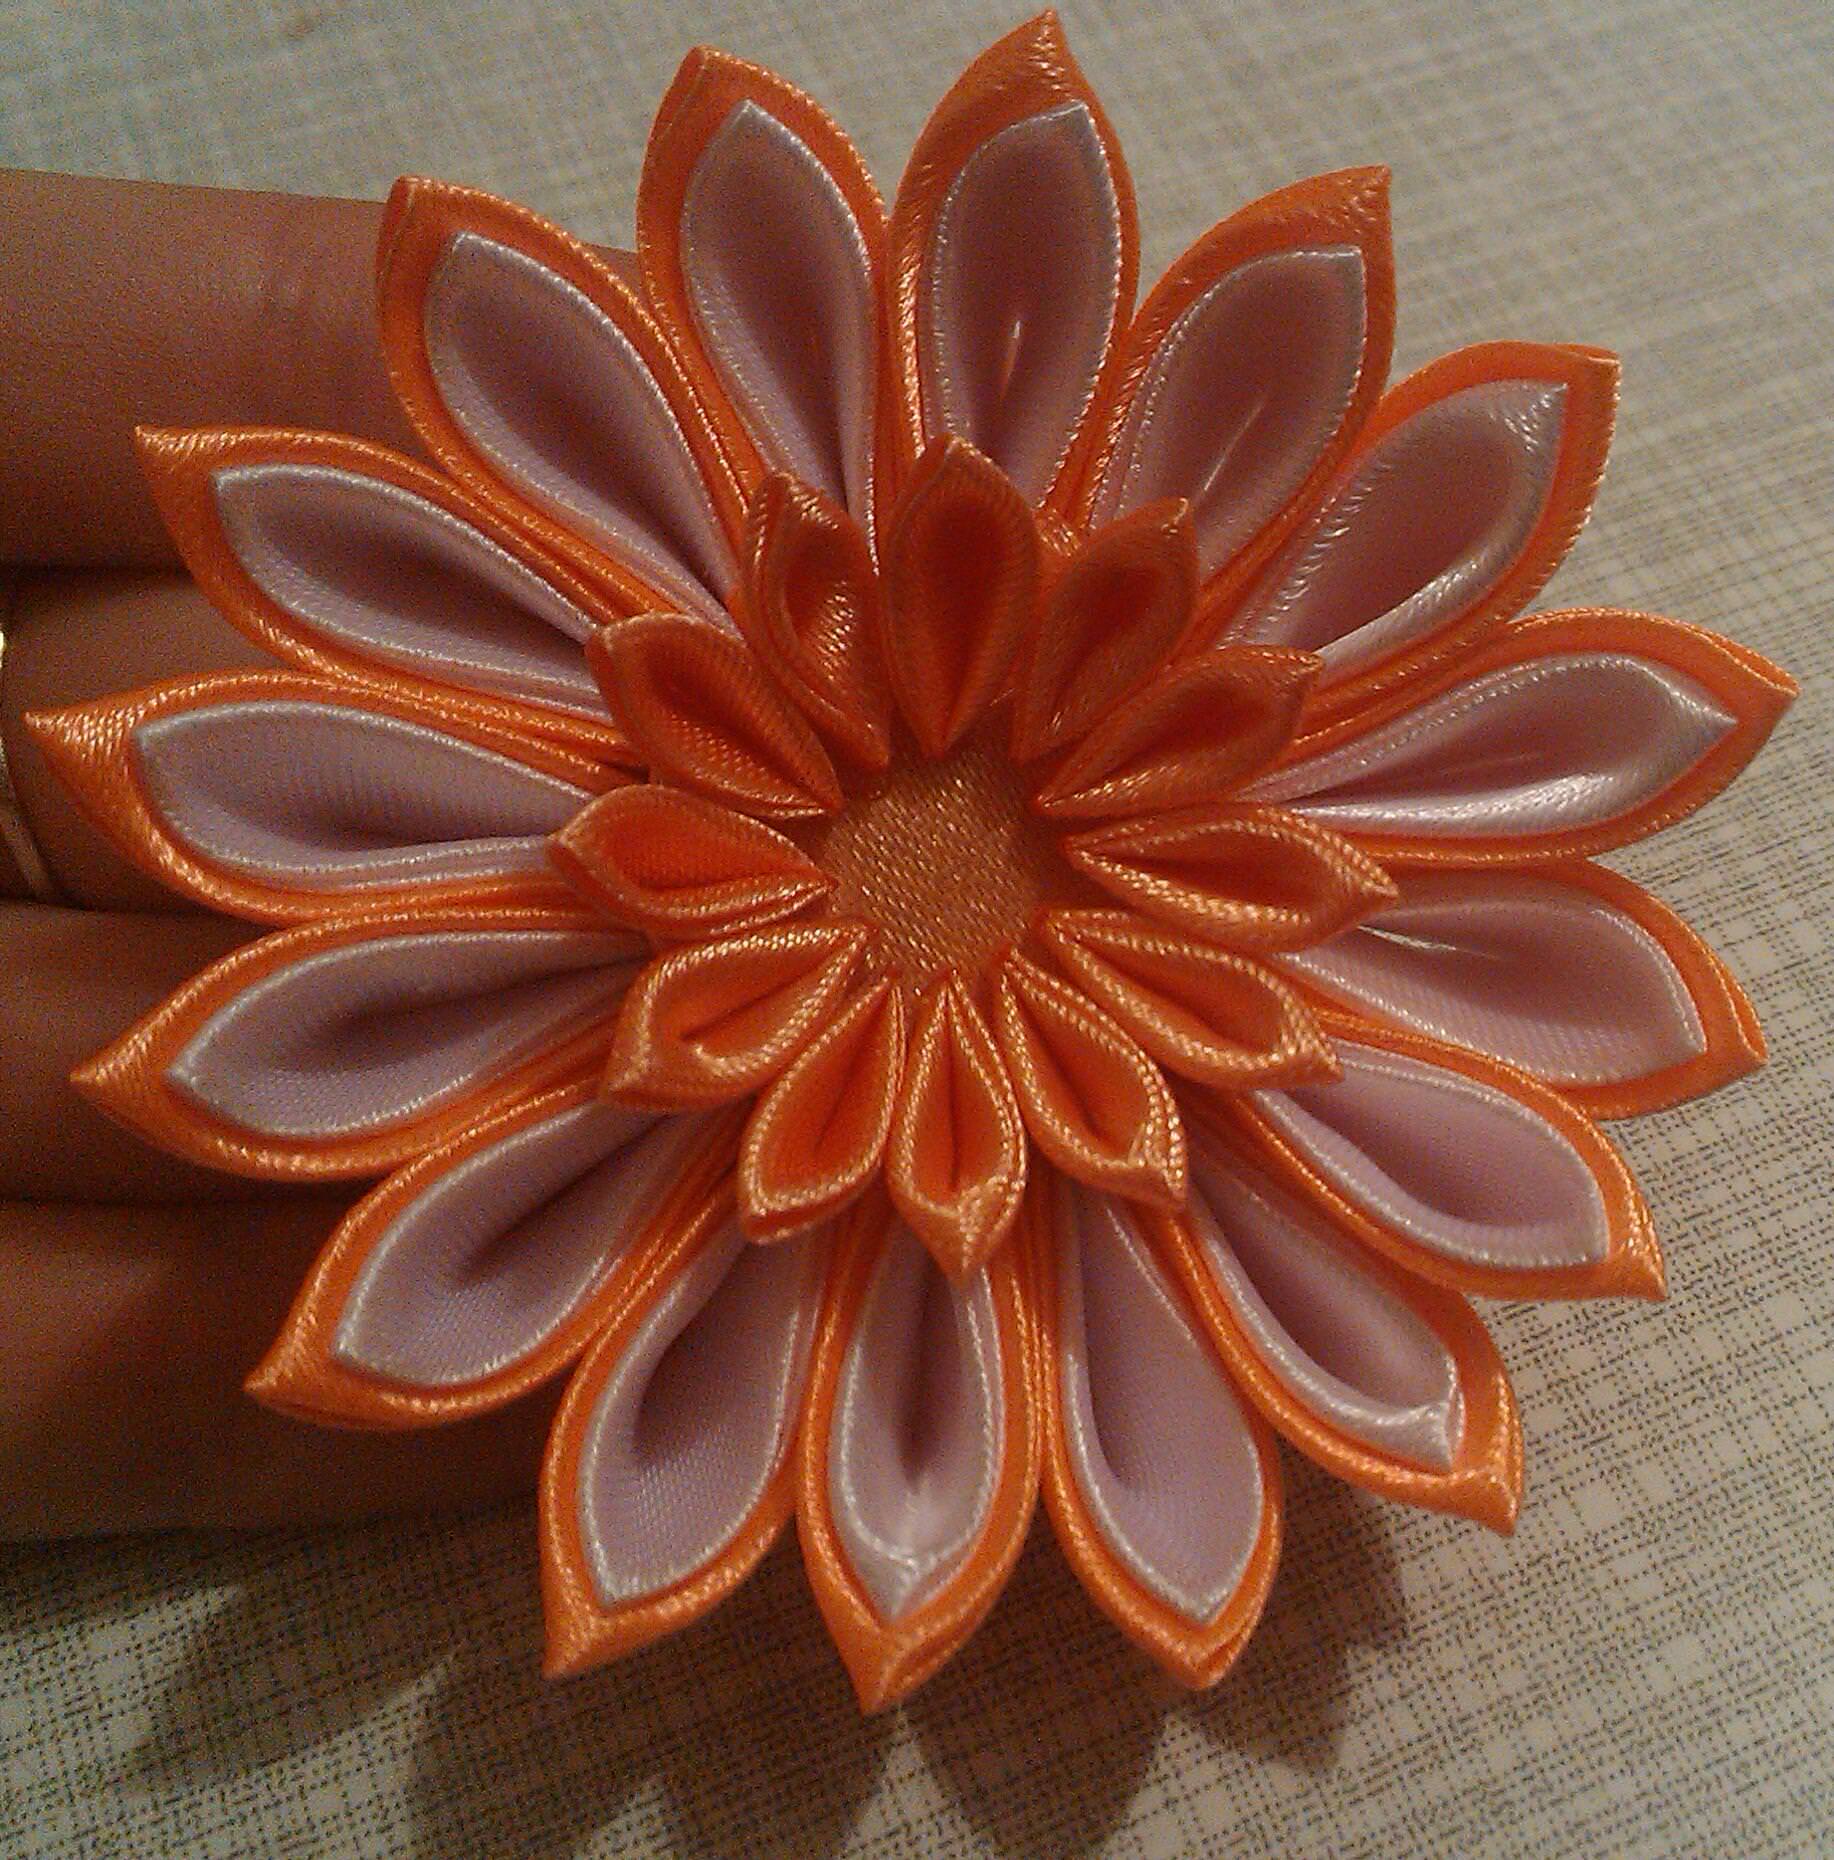
Our master class is coming to an end, all that remains is to decorate the flower. For this, we need a socket with a black bead. 
Place a drop of glue on the rosette and then on the bead, glue this decor into the center of the flower and press with your finger. Look what a tsumami kanzashi we got. 
Now take a simple hairpin, crab or elastic bands, onto which we will attach a flower.
Apply glue to the hairpin or crab, and press the flower against it, holding it a little with your fingers until it hardens completely. 


Spray a little hairspray onto the finished accessory.
This master class is for beginners, completely completed. In the same way, you can decorate hairpins or elastic bands. We hope that our video tutorials will be useful to you, and you will be able to create new hair decorations with your own hands.
Kanzashi hair band
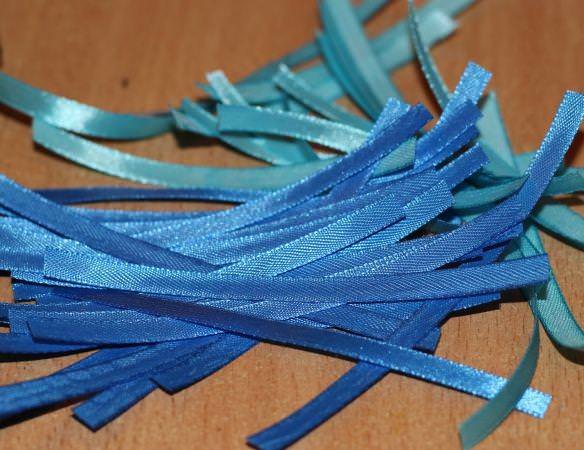
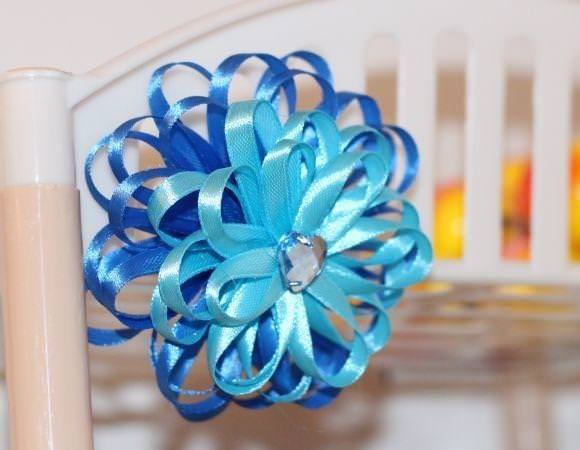
Such interesting master class, will be devoted to creating an elastic band for hair using the tsumami kanzashi technique. For this, we will need the following materials:
- narrow blue and blue ribbon. For use, it is better to take satin ribbons, but you can make an elastic band from grosgrain ribbons;
- scissors;
- candle or lighter;
- textile glue;
- a piece of satin fabric;
- rhinestones;
- regular elastic band or crab.
We will make these rubber bands two-color. To do this, take blue and blue ribbons. One is two meters long, and the second is one meter long. Cut the blue material into pieces of eight centimeters, and the blue material into pieces of seven centimeters. 
Fold each flap in half so that it overlaps and pour over the fire. 
From a piece of fabric, you need to cut a circle with a diameter of 2.5 cm and douse it with fire. Then, we begin to glue the blanks, symmetrically to each other. 


From the first to the third tier, the petal color will be blue. The next two tiers need to be created in a blue tint. Trim the topmost elements to make them shorter. 
In the middle of our tsumami kanzashi flower, which we made entirely with our own hands, we glue beautiful rhinestone, shaped like a heart. 
From the wrong side, we attach a simple elastic band for or crab, bought in a store, for little money. Before doing this, make a small mount for it. 
Our simple master class on creating an elastic band is completed. We hope that these lessons for beginners on kanzashi techniques have impressed you. The same method is used when decorating hairpins. A detailed video can be viewed on our portal.
Master class on weaving ribbon into a braid
Since ancient times, brilliant and beautiful hair, was calculated as a sign of beauty in women. A braid with a ribbon was considered a symbol of chastity and wisdom. If your hair is well-groomed and shiny, then you are a wonderful housewife.
Nowadays, braids with ribbons have not lost their uniqueness. On the contrary, they gained many admirers. How to weave a ribbon into a braid is a question every representative of the fairer sex asks herself when she is going to a holiday or just to work.
Our lessons will help you master the skill of weaving braids with ribbons.
Braids with satin ribbons woven into them make a woman more mysterious and tender. The tape looks especially interesting on dark and long hair Oh. If you don’t have a suitable ribbon at hand, you can create it with your own hands using a thread with beads. Such an accessory will turn simple hairstyle in the evening version. 
Get everything ready necessary materials to create a beautiful hairstyle, such as:
- crest;
- satin ribbon;
- crab and studs;
- decorative material for hair, such as a tsumami kanzashi flower.
You can insert the ribbon into a simple braid. If you want to create a bow at the end, then take longer material. So let's start our lessons:
- comb your hair well and make a ponytail with an elastic band;
- Tie a ribbon around the elastic band that will hide it underneath. The resulting edges of the tape should be the same length;
- Divide your hair into three buns and connect the outermost strand with a ribbon. Then, braid your hair as always;
- upon completion of this work, tie an elastic band and make a bow on top of it.
This hairstyle, like a braid with a ribbon, can be woven not only on the back of the head, but also on the sides or on the top of the head. If you have very long hair, braid the braid around your head, securing it with a hairpin.
Now let's weave french braid for beginners, also decorated with ribbons. Let's start the lessons:
- comb your hair and make an even parting. Braid the braid from one side and then from the other;
- make three bunches of hair on top, grabbing auxiliary strands from the face and begin to weave a French braid. When your braid reaches your neck, secure it with bobby pins. On the other side, do exactly the same actions;
- connect the braids together and decorate with a ribbon. Then, start weaving a simple braid with a ribbon.
Our wonderful master class is completely finished, with the help of your imagination, you can weave beautiful braids, decorating them with ribbons at your discretion. You can watch an interesting video on how to weave braids with ribbons on our website or on the Internet.
Video: Do-it-yourself kanzashi hairpin
Comments
Related posts:
 DIY beaded hairpins in a master class (photo)