Friends, I bring to your attention a selection of fabulously beautiful crocheted napkins, as well as patterns for them. In my opinion, crocheting napkins is truly the pinnacle of crocheting skill. This is beauty, subtlety of work, and all products are lightweight.
As part of this publication, I am collecting interesting, as it seemed to me, ideas for napkins knitted by needlewomen from all over the world.

Fabulously beautiful winter patterns can be brought to life using threads.

These airy snowflakes made of fabric are a kind of embodiment of flight and lightness. Napkins perfectly complement any interior and make it feel homey.

And of course, this is an excellent basis - a motive for knitting large elements, such as a bedspread or, say, a tablecloth.

In addition, sitting down and starting to knit a napkin is a great way to relax and get a charge of good mood.
Beautiful and simple crochet blue napkin for the table

I’ll start the selection with such a wonderful openwork napkin.
 Increasing!
 Oddly enough, this is both a training ground for beginners and a pedestal for professionals. You can both learn to knit and create masterpieces. For example, for beginners, small napkins are perfect for creating their first product. Well, the fact that knitting them is interesting allows you to captivate a novice needlewoman.
Beautiful classic crochet round napkin

A beautiful example of a crocheted napkin in fillet technique.
 Increasing!
 The knitting technique is also perfected by the fact that almost the entire arsenal of all kinds of loops is used in napkins. These include half-columns, chain stitches, double crochets, and many others. This gives you a good skill, and also teaches you to understand circuits.
I also want to draw your attention to the fact that these products also have different shapes. Here we can mention the classic round napkins, which are knitted in the round.
Knitted lace doily


Beautiful openwork crocheted napkin with floral patterns

An awesome crochet napkin - it captivated me with its elegance! The knitting pattern is below.

You can lay such a napkin on the table or put a vase of flowers on it.
When crocheting napkins, the method of using motifs is very often used. Motifs are square, round, triangular. There are also more complex polyhedra, such as hexagonal ones, but they are rarely used.
In addition to all of the above, there is also a wide variety of napkin knitting techniques. For example, Irish lace. Or Bruges lace - a Belgian technique. Creativity in knitting napkins is like art. Only the master creates not with the help of paints and a brush, but with the help of yarn and a hook.
Okay, I'm babbling about something. See below for a selection of samples various napkins. They have one thing in common - they are crocheted. All photos are enlarged. Just click on the image with your mouse. Good luck with your knitting! And come back often. I always have something interesting for you.
Knitting patterns are increasing!


For starters, there is such a wonderful simple option. Beautiful crochet napkin - amazing pattern geometry!


But this beautiful round crocheted napkin will fit well on the table. In general, we must admit that Japanese options are considered the most sophisticated of all. They are also presented in this collection.


Here's another nice example of a beautiful round crochet doily - the central web is of particular interest here.


And this napkin has a structure very similar to coral.


A beautiful classic crochet napkin that looks like a snowflake.


Pineapple patterns in a beautiful crochet napkin.


Beautiful round crocheted napkin with a spades pattern.

Crochet a tablecloth from napkins

A beautiful square crocheted napkin with motifs can be turned into a large enough tablecloth for the table. The advantage of squares is that they can be combined and ultimately get a large canvas.

These are the options. This is, of course, not all that could be shown. But be patient, we are in no hurry. Right?
Simple crochet napkin options for beginners


How to starch a crocheted napkin
After reading many guides on starching napkins, I came to the conclusion that they are hopelessly outdated. In all of them it is proposed to cook a paste from starch, but why such difficulties? It is much easier and faster to soak a napkin in wallpaper glue, which consists of starch that does not cause yellowing. It applies quickly and is not visible after drying. Ideal, in my opinion.
Make the solution thinner and dip a napkin into it, give it time to dry, and now you have a beautiful copy in front of you, smooth, without creases or curls. Wallpaper glue easily soaks in water, so don’t be afraid of ruining the product.
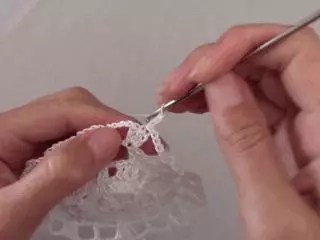
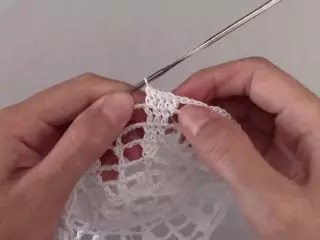
Video master class - simple crochet round napkin
To conclude the collection, I would like to show a simple and clear master class from Anna Andrienko on crocheting a simple napkin for beginners. There is nothing complicated in the lesson, just what a beginner needs.
I hope you liked these patterns for crocheting beautiful napkins and will take something for yourself to work with! Well, that’s all I have for today... Happy crafting!
Making your home comfortable is an important task for women. Today, knitted openwork napkins for the home or garden are coming back into fashion. They will add a touch of sophistication and tenderness to any interior. The napkin does not have to be white; the choice of color and shape is always in the hands of the needlewoman. In this article we will look at crocheting napkins with patterns and provide a description of fabulously beautiful napkins for home and garden. It is important to choose the right knitting threads and a suitable pattern in order to realize your idea.
Usually napkins are knitted from thin cotton. The traditional option is white cotton, measuring at least 300 meters per 100 grams.
But today it is not necessary to choose white or milky color for crocheting a fabulously beautiful napkin, patterns and descriptions of such napkins are further in the article.
Many thread manufacturers hand knitting They offer thin cotton in different shades. Among Russian companies you can choose Pekhorka " Baby cotton", "Summer", iris of any company. The thread from Vita “Pelican”, “Iris”, Alize “Miss”, YarnArt “Violet” is good in work.
Choose the color yourself, to suit the interior and to your taste. Universal, classic options There will be white, milky, cream, pale pink.
Today, microfiber napkins are also knitted. For napkins made from this thread, thin yarn is used. This could be Tulip yarn from YarnArt, viscose silk from Gazal and others.
To knit a napkin, you should choose a thin thread and small hook. A hook number from 1 to 2 is quite suitable, depending on the thickness of the yarn and the idea.
The finished cotton or microfiber napkin should be washed and dried horizontally, laid out on a flat surface on a towel or any fabric. Afterwards you can iron it. Some people starch napkins, but today you can skip this or make a weak starch solution to give the napkin a clear shape.
Patterns for crocheting napkins with descriptions
One of the traditional shapes for a napkin is a circle. Let's take a closer look at several models and patterns of crocheted round napkins, they are all fabulously beautiful and airy, such napkins will decorate any interior.

Option 1
A napkin with rays radiating from the center is a very delicate and cute option. This pattern is not difficult to knit; even a novice needlewoman can handle it. But the result will amaze with its beauty. For this napkin you need to take thin cotton and a small hook.

Start knitting from the center, like all round napkins. We do this:
- We collect 6 air loops and close them in a circle. We knit three air loops for lifting to the next row. This way we will move to the next row each time.
- We knit another 19 double crochets into the resulting circle and close it into a circle with lifting loops. In total we get 20 columns in a circle.
- Next we knit according to the pattern below.
When the napkin is knitted, we tie it with openwork arches of air loops with picot. We do picot like this: we thread a thread into the loop of the previous row and knit 3 air loops. We fasten the picot into the same loop of the previous row. It turns out to be a small loop.
Option 2
Very interesting option napkins with knitted feathers. This pattern is obtained by alternating arches from air loops and double crochets.

Let's start knitting:
- We close 3 air loops in a circle and knit 3 lifting loops for the next row.
- We make 11 double crochets in a circle and close them with lifting loops.
- Next we knit strictly according to the given pattern.
- The last row of the napkin, according to the diagram, consists of arches of air loops. If desired, you can make them with pico.
Option 3
A napkin with spikelets is an excellent option for decorating a country room. For its implementation, a diagram is given below. We start knitting by casting on 12 air loops and closing them into a ring. Next we knit 3 lifting chain stitches and another 27 double crochets into a ring. Next we follow the diagram.

Option 4
An amazing airy napkin with an unusual pattern can decorate your interior. It knits easily and quickly, the main thing is not to lose track of the air loops. It is the air loops and chains of them that form this mysterious and unusual airy napkin pattern.

To get started you need:
- Cast on 12 air loops and close them into a ring.
- Tie the resulting ring with 22 single crochets.
- We knit the next two rows with the same number of single crochets.
- Next, we move on to a series of chains of 21 air loops. We knit the last arch in the row from a chain of 10 chain stitches and a stitch with 9 crochets. The next row goes to the tops of the resulting chains.
- Next we knit according to the pattern.
Option 5
Crocheted napkin made from the finest gossamer with knitted flowers - unusual and fabulous nice option napkins, the diagram of which is given below.
To perform this you will need very thin cotton. You can take a regular bobbin thread and the thinnest hook No. 0.5 or 0.25.

Option 6
A very beautiful napkin with a pattern of lush columns. They are performed as 3 double crochets from one loop of the previous row with a common top. We knit according to the pattern, starting from a ring of air loops.

Option 7
A napkin with a star in the center, which consists of lush columns. There are openwork fans along the edges. Knitting is also done from the center from a circle of air loops.

Option 8
Napkin in the shape of a sunflower. Very beautiful and tender. Knit according to the pattern given below.

Option 9
Another openwork beautiful flower. Maybe a sunflower, it is made of double crochets and arches made of air loops. Knit according to the pattern given below.

Option 10
An amazingly beautiful napkin with bunches of grapes radiating from the center. Each berry in the bunch is knitted from lush double crochets.
They are made from one loop of the previous row. We knit 5 double crochets with a common top. This is how we get a lush column. We knit according to the pattern from the center.

Option 11
Very beautiful napkin white cotton. Its highlight is the rounded fans, which are located closer to the center and along the edges of the napkin.
To knit this napkin, it is better to use thin mercerized cotton, which holds its shape well.
We start knitting from the center and follow the pattern given below.

Oval napkins with diagrams
Oval napkins look no less interesting and beautiful than openwork round napkins. They are knitted from the center according to the pattern.
But then they diverge along the edges with an increase in volume and elongation of the pattern.
Napkins can contain the same elements as round ones: fans, arches of air loops, lush columns, pineapples, and so on.

It is important to follow the diagram for each specific model. Several diagrams for oval napkins are given below.
A very interesting version of a napkin is an oval napkin consisting of circles connected by a web of air loops.
In order to make such a beautiful and interesting napkin, you need to knit three large circles according to the patterns below or according to any patterns of openwork circles.
Then we tie the napkin with a wide border according to the given pattern.
Napkin made of elements
A napkin made of interconnected hexagonal elements looks stylish, beautiful and gentle.
To perform such a fabulous work, we need to knit the first hexagonal element according to the given diagram.

After the entire number of hexagons required for the napkin is knitted, we tie the edges of the napkin according to the pattern given below.
Napkins using fillet knitting technique
Fillet knitting is a special crochet technique, the principle of which is to knit empty or filled cells.
The filled cells form a pattern. It could be a floral pattern, animals, graphic pattern, people and so on.
Using the fillet technique you can knit any item, including beautiful napkins.
The main thing is to understand the principle fillet knitting. We start by casting a chain of air loops of the length we need. Then we knit the cells.
The classic option is empty cell from a double crochet, 2 chain stitches and another double crochet. A filled cell is 4 double crochets.
The last double crochet of one square is the first double crochet from the next square.
Filet knitting patterns are usually drawn with checkered patterns, the pattern is painted over dark color and the cells are used to read the picture and knit the pattern.
Basically, napkins using the fillet technique are knitted in the shape of a square or rectangle using a set of chain stitches. Knitting from bottom to top. But there are patterns that allow you to knit a fillet napkin in a circle from the center.
We start knitting as for a regular napkin with a ring of air loops and several double crochets of the second row, knitted into this ring.
The article contains diagrams for such napkins. In fillet knitting, the main thing is to maintain the exact number of empty and filled cells. Using the fillet knitting technique, you can also make borders for fabric napkins.
The interior of the stylishly decorated home features handmade accents. Guests are sure to pay attention to crocheted napkins: patterns allow even beginners to create small masterpiece for those closest to you. Weightless openwork products embody different ideas - from abstract and floral motifs to figures of animals and insects. Thread manufacturers offer a huge selection of colors and materials. The final result depends on imagination, the purpose of the accessory and the skill of the needlewoman.
Handicrafts are back in trend. Housewives and successful businesswomen spend their evenings embroidering or knitting. For beginners, the greatest difficulty is caused by graphic instructions or text symbols. But gradually the crochet napkin pattern becomes an open book.
Conventions in text descriptions
For the convenience of needlewomen, universal names for the main elements - loops and posts - have been adopted:
- Basic air loop forms the basis of lace accessories of any shape and size, denoted by the abbreviation VP;
- The second most important element is the semi-column, which is abbreviated as PS. Another name is a connecting column.
- Crocheting a napkin necessarily includes making single crochets (SC) and double crochets - C1H, C2H, C3H. The numbers decipher the number of yarn overs - there can be more than three. It all depends on the complexity of the technology.
The combination of the presented elements according to the instructions allows you to create various patterns. Typically, textual explanations are attached to graphical manuals and provide details of the process. They are easier to navigate if difficulties arise.
Note to the craftswoman - deciphering abbreviations
Conventions in knitting patterns
Experienced knitters determine the structure of the pattern based on the finished product and can repeat the design they like. Craftsmen who know how to draw well and have spatial imagination create new napkins with crochet patterns themselves,
The author's developments serve as a guide for less experienced followers. Magazine and online publications can be easily identified by graphical symbols. This is the universal language of the creators of lace accessories, understandable to needlewomen all over the world:
- Circle - air loop;
- “Em dash” – half-column;
- “Plus” – single crochet;
- “Cross stitch” with one or more transverse dashes – double crochets, where the number of “crossbars” indicates the number of double crochets.
The manuals also present additional elements that enhance the expressiveness of the pattern and help create various effects:

Symbols
How to read knitting instructions correctly
Without exception, all the manuals are standardized and figuring out how to crochet a napkin is not difficult:
- If the process proceeds in straight or reverse rows, the circuit is passed in rows from bottom to top. When making round products, start from the center.
- Odd rows are considered front rows and are read “in Arabic” - from right to left. Purl even ones as usual - from left to right.
- The repeating part of the pattern - rapport - is concluded between the “asterisks” (*...*). This symbol means that you need to repeat all the elements the specified number of times.
For the convenience of the master, the front and back rows can be marked in different colors or numbered. This makes it easier to navigate and not get lost, especially when knitting large items.

Two-color instructions are easier to read
It is important to know! “Round” instructions are “read” counterclockwise – they go sequentially from right to left.
Basic working techniques to make the process easier
How to crochet a napkin - the journey in the world of needlework begins with this pressing question. To avoid disappointment after the first experiments, you should take the advice of experienced craftsmen.
Preparatory stage
Before starting the process, stock up on tools and consumables. It is not recommended to choose thin threads for debut processes. Openwork lace will take a little time, but the first results will inspire you to improve your skills.
The best yarn to start with is mercerized cotton thread "Iris". They are quite elastic, smooth, pleasant to the touch. Presented in a wide range color scheme. Disadvantages include a tendency to curl.
As your skills improve, the yarn becomes more manageable and stops tangling. Acrylic and wool blend threads are also suitable for first experiments.
Detailed master class makes the first steps easier:
It is better to start your debut crocheting of napkins with a tool No. 1.5-2.5 with an ergonomic handle. When purchasing, it is better to compare several samples, evaluate which hook fits comfortably in your hand, and choose the appropriate length.
Step-by-step photo instructions
For the first experiments, choose a simple, intuitive pattern without complex double crochets. IN finished work there will be fewer mistakes.

The optimal pattern for a successful debut
How to crochet a napkin for beginners:
- Start from the center of the future product - cast on a standard chain of air loops. IN in this case- 12.
- Loop the loops with a connecting semi-post.
- Move to the next row - knit the required number of VPs according to the schematic guide and move on to other elements - the pattern is based on C1H.
- Tie the ring completely - you should get 32 C1H. The circle is connected to a chain of 3 VPs and completes the row.
- The following elements are performed according to the diagram and follow the direction of movement counterclockwise.
- The last row is performed using the picot technique, which can be found in the video tutorial:
Place the finished napkin in a visible place


Step by step photos illustrate the operating procedure
Color variations
To diversify napkins, novice needlewomen can use a simple and effective technique when crocheting - knitting multi-colored items using the same patterns or combining two or more colors in one accessory.

Napkin made of C1H - schematic illustration

The finished result
This solution allows you to create interesting accessories during the first experiments. A simple pattern looks more interesting, the product looks original and does not create a feeling of being secondary. You can safely decorate a table or window sill with it - place it under a flowerpot with indoor plants.

The original spiral beauty is a feasible challenge for beginners

The same design in a rainbow solution
Acrylic threads and iris are suitable for the process. The simplicity of the design is compensated by the spectacular color scheme.

An example of a spectacular solution - a sunflower

Sunflower diagram - the remaining fragments represent rapport
Trendy napkins for home and as a gift
The world of handicrafts has its own fashion and good omens. It is believed that accessories can have a positive effect on family wealth and the aura in the home. There are rituals associated with the beginning and end of the process. Crocheting napkins for beginners is no exception.
Money napkin
There is a belief associated with this decorative element. A coin placed in the center of the product has a positive effect on the family budget and promotes well-being in the home. The craftsmen begin work on the new moon. The future amulet is pulled at random from a bag into which the “candidates” are previously placed.
The coin must be odd, the denomination and country of origin do not matter. Knitting needs to be completed while the moon is growing. Napkin patterns from foreign magazines are suitable - the shape is important, it must be round. Pattern and size are of secondary importance. Such a talisman is kept in a place of honor to attract good luck to the house.
There are two ways to insert the amulet into the center of the accessory:
- At the beginning of the process. It is necessary to knit an amigurumi ring, the diameter of which corresponds to the central part of the napkin and coin. Further knitting will proceed strictly according to the instructions, and the pattern will not change.
- At the end of the process. In this case, a model with a closed center is chosen and at the final stage an additional element is knitted - a kind of repeat of the central part of the napkin. The part is sewn to the product, a small gap is left and a coin is placed in the pocket. Then the hole is sewn up.
A crochet money napkin - the diagram is presented below - differs in execution from the usual one. You can take almost any model as a basis. The central part is preliminarily assessed to determine whether the “core” is suitable for placing the coin.

Detailed diagram of a money napkin


The amigurumi technique is used to knit the center.
Video tutorial on knitting an amigurumi ring:
Openwork products
Weightless lace accessories serve as decoration for a dining table, chest of drawers, nightstand. Graceful, stylish and lace, fit into any interior style. This is a great gift and sign of attention. In such work, they invest more than skill - inspiration and a craving for beauty.
Beautiful crocheted napkins - patterns can be very different - look gentle and airy. Needlewomen have the opportunity to work with shapes and create not only round, but also oval and shaped products.
The basis of the plots are floral elements, which are generously trimmed with lace from air loops. Often, needlewomen choose abstract or ethnic motifs. Butterflies look beautiful and attractive.
Crochet openwork napkins according to the patterns are made in the same way as more simple options. The knitting order does not differ from the standard one. It is necessary to ensure compliance with the manual - a minor error will have to redo the entire process. Therefore, before you start, you should evaluate your strength and skill.

Guide to knitting an openwork accessory

Example finished product

Beautiful butterfly– interior decoration

Stylish home decor element
Bulk napkins
Aerobatics in handicrafts – unusual napkins crochet: you have to figure out the patterns, but the end result is completely worth the effort. Volumetric products look unusually beautiful and fascinating.
The instructions for creating such masterpieces require careful study and attention to detail. They give enormous scope for creativity and implementation of ideas. In such work, various solutions are possible:
- multilayer “rosettes” for decoration – tightly starched, turning into a lace vase;
- floral arrangements - on the table all year round a bright, unfading bouquet blooms;
- butterflies or swans - the lightness of some and the grace of others fascinate and delight.

Example of graphic instructions and finished result

In this process, each swan and flower are knitted separately and sewn to the base.

Bright flower composition will warm you even on a winter day

A spectacular combination of openwork elements and voluminous colors
Creating such products is a labor-intensive process. It takes skill, patience, and skill. Master classes give a general idea of how to crochet tablecloths and napkins - diagrams and photos help you understand the general principle. For high-quality implementation of an idea, it is best to contact for experienced needlewomen.
Masters work with ready-made magazine designs and create original compositions - this significantly expands the possibilities for creativity. Professional execution guarantees the absence of errors and flaws, accuracy and perfection. At the same time, you can learn a lot - invaluable knowledge and skills will be useful in the future when it comes time for your own master classes.
It's always nice to create something new and beautiful for your home, for example, knitting napkins. Light and airy, with various shapes, they will not leave anyone indifferent. An exquisite hand-knitted napkin can significantly transform the interior, create tenderness and comfort in the home.
The napkin is knitted in circular rows on a ring of 8 chain stitches. The flower in the center is beautifully highlighted thanks to the bias net knitted around it. The border between the round center and the peripheral part openwork napkin serves as a relief made with relief columns. The same technique was used to create volumetric accents at the base and on the tapering sections of the petals in the middle part of the pattern.
The volume of the entire pattern of the openwork napkin is given by the contours of the petals made in relief columns. The pattern is completed by “fans” made above the original gaps between the petals.

When making any pattern and crocheting a napkin, in particular, be creative. Try replacing different volumetric elements. Perhaps you will find a better solution based on your individual knitting style.
 For example, the “bump” crocheted in the 22nd row can be replaced with a lush column, and in the “fans” of the peripheral part of the openwork napkin, “corn kernels” can be crocheted instead of “bumps”.
Number of pulls for lush column and the number of dc, forming a “corn grain”, select taking into account the thickness of the thread used and the desired effect. You can also enhance the relief by knitting treble crochets on the far half-loops. 10th row of openwork napkin crochet decorative row.
Relief columns forming the outline of the petals around the round center knitted napkins, knit with an additional drop of loops.
In the 22nd row, tie a “bump” of 3 cm. 1n. Having completed the 5th treble crochet, work 3 treble crochet stitches. with a common base, sticking a hook under the st.bn. 10th row; Pull up a stitch for the 6th dc by pulling the yarn through the top of the 4th dc. prev row; Knit all the loops on the hook in one step.
Or complete the “bump”, and only then work the 6th crochet stitch.
Napkin pattern:

More napkins and diagrams for them:


It’s always nice to please your loved ones and do something new for your own, because they create a special atmosphere of warmth and love. Crocheted napkins have always been a decoration for our grandmothers’ apartments; they also find their response in... Today the craftswomen of the website editor will share simple and beautiful diagrams with detailed step by step description, all you have to do is stock up on some strings and begin the exciting process. Ours will inspire you to a completely new type of needlework, which is accessible not only to experienced knitters, but also to beginning lovers of handicrafts.
It is always difficult for beginning craftswomen to take the first step and decide on the design and choice of template. At first symbols they resemble Chinese letters, but once you knit one napkin, this type of needlework will become a new hobby for many years.
There is a huge variety of techniques that are constantly being updated thanks to the ideas of craftswomen. You can knit napkins of any shape and size using a continuous manufacturing method, or combine several motifs into one. The following techniques are especially popular.
| Illustration | Crochet technique |
 | Loin - alternating empty and filled cells. |
 | Vologda lace. |
 | Bruges lace. |
 | Irish lace. |
 | Napkins knitted from individual parts-motifs. These can be geometric shapes combined into one delicate canvas. |
Recently, crocheting napkins has become not only a favorite activity of craftswomen, but also the main source of income for many. They sell their works of art all over the world thanks to the developed Internet. Exquisite items make wonderful gifts for women of any age. Having mastered different techniques knitting, you can start making garments and larger items, for example, or.
If you are inspired by handmade creativity, we suggest starting your collection with simple napkins, and our step by step guide with a photo description will help you understand complex circuits.

Master class on crocheting a simple openwork napkin
It is better for beginning craftswomen to master the skills of simple jewelry, master simple ones, and only then move on to more complex patterns. We will knit the first napkin in the shape of a flower from 9 petals.
For work we will need:
- white cotton yarn;
- hook 1.6 mm.
Legend:
- СС – connecting column;
- RLS, SC – double crochet;
- CH – double crochet;
- NZ – unfinished column;
- VP – air loop;
- PSN - half double crochet.
Let's get to work.
| Illustration | Description of action |
 | Secure the first loop, cast on 5 ch, insert the rod into the first and finish with a sl st. |
 | 1 row Cast on 3 VP rise + 2 VP, make a yarn over, insert the hook into the ring and knit a dc. Repeat 7 times: 2 ch, hook into the ring and dc. There should be a total of 9 columns, the first 3 VPs are considered a separate CH. |
 | 2 VP, insert the hook into the third VP of the lift and finish with a SS. |
 | 2nd row Insert the rod into the arch and knit SS, 1 VP rise, insert the hook into the arch and knit RLS, 2 VP + yarn over, knit SN in the arch, 2 VP knit RLS in the arch. Repeat rapport in all arches. |
 | 3rd row Insert the hook into the top of the sc, knit a sl, insert the hook under 2 ch, knit a sl, insert the hook into the column and knit a sl, 1 ch, insert the hook into the top of the column and knit the sc. |
 | 4 row Cast on 4 ch, insert the hook into the top of the column and knit a sc. Repeat knitting along the entire diameter of the napkin. When finished, insert the hook into the top of the column and finish with a SS. |
 | 5 row 1 VP, insert the hook under the arch and knit a sc. Yarn over and knit into an arch, repeat 4 more times. Insert the hook into the arch and knit a sc. Repeat all steps with all arches. |
 | Knit a row and insert the hook into the sc in the previous row, ending with a sl st. |
 | 6 row SS first to the first, then to the second peak, then 3 VP lifts. Rapport: yarn over, work a dc into the next vertex. Yarn over again and work a dc into the next stitch. 2 ch, yarn over, insert hook into top of sc and knit daisy chain. Yarn over, hook into the top of the sc, knit nc and join all the loops. 2 ch, skip one tip and insert the hook into the next one. Repeat all steps around the entire circle. |
 | Knit a row, insert the hook into the third lifting loop and finish with a sl st. |
 | 7 row 3 VP lifting. Rapport: 3 ch, yarn over, hook into the top of the joined stitches and work a dc. 3 ch, hook into the top of the central column and work a dc. Knit the entire circle, insert the hook into the third lifting loop and knit a sc. |
 | 8 row 3 VP lifting. Rapport: yarn over and work a dc in the same loop. Yarn over and work a dc into the same loop. Cast on 4 ch, yarn over, hook at the top of the column, work a dc. Repeat until the end of the row, insert the hook into the third ch of the lift and finish with a sl st. |
 | 9 row 3 VP lifting. Rapport: yarn over, work a dc at the top of the next column, yo, work a sc at the top of the next column. 5 ch, yarn over, hook to top of next dc. You should get 3 dc, a chain of 5 ch, dc and a chain of 5 ch. To close the row, insert the hook into the third ch and finish with a sl st. |
 | 10 row 3 VP lifting. Rapport completely repeats the previous row. |
 | 11 row 3 VP lifting. Rapport: yarn over, work 2 dc in the same ch. Yarn over and work a dc at the top of the next stitch. Knit 2 dc in the third stitch. 4 VP in CH. Repeat to the end of the row, close the SS row in the third lifting loop. |
 | 12 row 3 VP lifting. Rapport: yarn over, hook at the top of the column, dc. 2 ch, yarn over, work a dc at the top of the next stitch. 3 ch, yo, work dc at the same top. 2 ch, yo, work dc in next stitch. Yarn over, work a dc into the next vertex. 4 ch, yarn over, work dc in a column. 4 VP. Next, all actions are repeated to the end and closed in 3 VPs of lifting the SS. |
 | 13 row 3 VP lifting. Rapport: yarn over, hook into the top of the post and work a dc. 2 VP, yarn over, in an arch of three VPs, dial 9 CH. 2 ch, yo, work dc in next stitch. Yarn over, dc at top of next st. 3 ch, yarn over, pull dc in a column. 3 VP. Repeat until the end, ending with a SS in the third VP of the lift. |
 | The drawing at this stage should be clearly visible. |
 | 14 row 3 VP lifting. Rapport: yarn over, hook at the top of the st, knit a dc. 4 ch, yarn over, shank into top of first of nine stitches, work dc. In the second column, knit two dcs. Work one dc in the third stitch. 3 ch, yarn over, hook in fourth stitch, work dc. Yarn over, crochet two dc in the fifth stitch. Yarn over, dc in the sixth top. 3 ch, yarn over in the seventh stitch, work in a dc. In the eighth column we knit two dcs. In the ninth column, knit one dc. 4 VP, knit one dc at both vertices of the following columns. 2 ch, yarn over, work a dc at the top of the column. 2 VP, knit a double yarn over first to the first, then to the second top of the stitches. 4 VP. Repeat all steps until the end of the row, close the SS into the third VP. |
 | Rapport 14 rows. |
 | 15 row 3 VP lifting. H, rod to the top of the column, CH. Rapport: 3 VP, work RLS into the arch. 3 VP, hook in the next arch, sc. 5 VP, hook in the next arch, sc. 3 VP, insert the hook first into the first stitch, knit a sc, then repeat with the second stitch. Yarn over, insert the hook through one st into the next pair, knit one dc with each vertex. |
 | Row 15 rapport. |
 | 16 row Insert the rod into the top of the column, knit a SS. 1 VP of lifting, knit RLS in the same column. Rapport: 3 VP, knit RLS in the first arch. 3 VP, hook into the same arch and knit a sc. In the next arch: 3 VP knit stbn, 3 VP knit stbn. 3 VP, hook in the next arch, sc. 2 VP, knit a NC yarn over in the same arch, yarn over, knit a second NC yarn over in the same arch, combine all the loops. |
 | 3 VP, insert the hook into the first loop, knit a connecting stitch. |
 | Yarn over, work NC into the arch. Yarn over and knit NC again, bind off the loops. 2 VP, knit RLS in the same arch. Repeat all actions of this row according to rapport. Knit a row, insert a shank at the top of a single crochet, knit a sl st, pull out and cut the thread. |
 | This is the kind of lacy napkin you should end up with. |
Napkin “Bright Sun”
We will have the next master class only with a diagram and step-by-step description. We will knit a napkin in the shape of a sun with a diameter of 15 cm, for which we will need yarn and a hook according to the thickness of the thread.

In the process of work, you must adhere to the diagram, which describes in more detail the combination of loops and the marking of columns.
Dial 8 VPs, combine them into a ring.
- 1 VP rise, 16 St BN, finish row SS.
- Rapport: 1 PSN, 5 VP. Repeat 8 times.
- Arch: SS, 5 CH, 2 VP. Repeat 8 times, ending with a SS row.
- 2 dc, 3 dc, 2 dc, 2 ch. Repeat 8 times.
- Skip stitches 2 and 6, then knit rapport as follows: 5 dc from one top, 3 ch, under 2 ch of the previous row, knit 1 dc, 2 ch, 1 dc. Repeat 8 times and finish with a SS row.
- Under all the arches from VP, tie 1 CH, 2 VP, 1 CH, 3 VP. Complete row SS.
- Knit a ss under the arch, then knit a rapport: 1 dc, 3 ch, 1 dc, 3 ch. Skip one arch and repeat knitting until the end of the row. Finish row 1 VP, 1 PSN.
- Rapport: 1 sc under the arch, 5 sc under the next arch. Repeat until the end, ending with a SS row.
- Pull out the last loop, cut and fasten the thread.

Step-by-step description of the “Pineapples” pattern
Tender and beautiful pattern“Pineapple” is often used by needlewomen not only in knitting napkins, but also openwork blouses, so any craftswoman should learn to understand this scheme. Let's look at the step-by-step description in more detail. By default, each row of the pattern ends with a SS, and at the beginning, instead of 1 DC, three VPs are knitted for lifting.
- Connect 6 VPs into a SS ring. Knit 3 ch and 19 dc.
- 1 VP, repeat: 3 VP, 1 RLS in the next stitch. When finished, knit 1 sc in the first ch.
- 1 VP, rapport: 5 VP, knit 1 RLS in the arch. When finished, knit 2 ch, 1 dc in the first ch.
- 1 VP, rapport: 7 VP, knit 1 RLS in the arch. When finished, knit 3 ch, then double crochet into the first ch.
- Knit No. 5 and No. 6 by analogy with No. 4.
- Knit rows 7 and 8 as follows. 1 VP, rapport: 9 VP, 1 RLS in the arch. Finish row 4 VP, 1 double crochet in the first VP.
- 9th and 10th rows: 1 VP. Rapport: 11 VP, 1 RLS in the arch. Finish row 5 VP, 1 stitch with 4 crochets in the first VP.
- In the 11th row, knit 2 SS to the arch, then rapport: 3 VP, 1 SN, 2 VP, 2 SN, 6 VP.
- The 12th row begins with rapport: in the first arch under 2 VP, tie 3 VP, 1 CH, 2 VP, 2 CH, 6 VP. Then in the second arch 7 CH, 6 VP. Repeat until the end of the row.
- At the beginning of the 13th row, knit 2 SS to the arch, then repeat the rapport in each arch: 3 VP, 1 SN, 2 VP, 2 SN, 6 VP. Next, move to the 7th column of the previous row, you need to knit 6 times (1 dc, 1 ch), then 1 dc, 6 ch. Repeat the entire rapport until the end of the row.
- At the beginning of the 14th row, knit 2 SS to the arch, then the scheme of work is as follows: 3 VP, 1 SN, 2 VP, 2 SN, 2 VP, 2 SN, 6 VP, 1 RLS under 1 VP. Next, you need to repeat 3 VP, 1 RLS 5 times and finish the repeat with 6 VP.
- 15 row: two SS, repeat: 3 VP, 1 SN, 2 VP, 2 SN, 3 VP, under 2 VP knit 2 SN, then continue the row 2 VP, 2 SN, 6 VP, 1 RLS under VP, repeat 4 times 3 VP and 1 RLS, 6 VP. Repeat until the end of the row.
- Row 16: two SS. Rapport: 3 VP, 1 CH, 2 VP, 2 CH, 9 VP, under 2 VP tie 2 CH, 2 VP, 2 CH, 6 VP, 1 RLS under 3 VP, 3 times (3 VP+1 RLS), 6 VP.
- The beginning of the 17th row is similar: 2 SS. Rapport: 3 VP, 1 SN, 2 VP, 2 SN, 9 VP, 1 RLS under the arch, 9 VP, under 2 VP tie 2 SN, 2 VP, 2 SN, 6 VP, 1 RLS under 3 VP, 2 times 3 VP and 1 RLS 6 VP.
- 18 row: 2 SS, rapport: 3 VP, 1 SN, 2 VP, 2 SN, 9 VP twice and 1 RLS under the arch, then 9 VP, under 2 VP tie 2 SN, 2 VP, 2 SN, 6 VP, 1 RLS under 3 VP, 3 VP, 1 RLS in an arch, 6 VP.
- The beginning of the 19th row is similar to 18. Rapport: 3 VP, 1 SN, 2 VP, 2 SN, 3 times 9 VP and 1 RLS under the arch, 9 VP, 2 SN under 2 VP, 2 VP, 2 SN, 6 VP, 1 RLS under 3 VP, 3 VP, 6 VP.
- We start the last row with two SS, then according to the pattern: 3 VP, 1 VP, 2 VP, 2 SN, then 4 times 5 VP, picot from 3 VP, 5 VP, 1 RLS under the arch. We continue rapport 5 VP, picot from 3 VP, 5 VP, under two VP knit 2 CH, 2 VP, 2 CH.


Conclusion
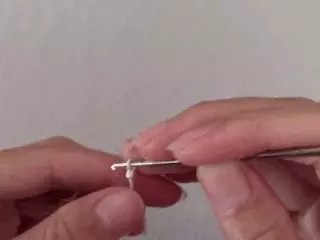
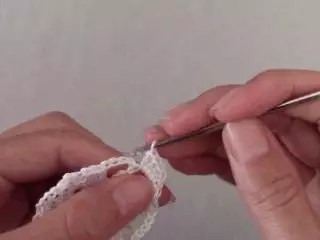
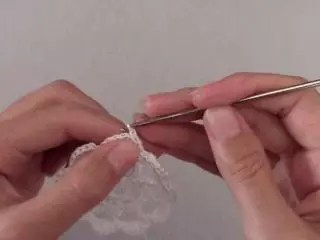
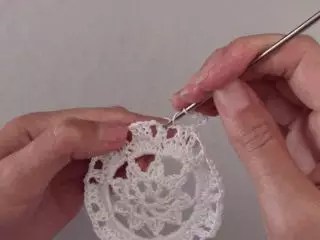
And in conclusion, we suggest watching a master class on knitting a simple napkin in just 15 minutes.