Crocheting is a good old tradition that is still supported by many craftswomen. The popularity and prevalence of such decor greatly simplifies the search for the desired pattern and description for it. However, there is also back side situation: crocheted napkins have become so boring for knitters that they have become a kind of synonym for banality. The situation is saved by the development of fresh schemes and the search for new areas of application of familiar objects.
Types of napkins
Despite the fact that the first association with the word “napkin” invariably becomes an openwork circle, there are square, pentagonal and hexagonal, rectangular, diamond-shaped and many other shapes of napkins.
In modern designs, the large one can be relatively solid or openwork) most often remains round, but squares are also often found. It must be said that decorative elements with right angles are easier to place on flat surfaces.
The basic principle of knitting napkins
Knitting work on almost any napkin begins from the center and, gradually expanding the fabric, ends with the widest row. The only exceptions are products assembled from several separately related motifs.
Both small and large (the circuit can be of any shape) requires the presence of several main components:

Depending on the specifics of the pattern, the main fabric of the product may include some elements. For example, the technique of duplicating stripes of a pattern is often used. They are placed at different distances from the center, interspersed with very openwork or, conversely, solid areas. This distribution of the ornament allows you to effectively expand the canvas while maintaining the overall harmony of the product.
Knitting napkins

This one is not large napkin knitted as follows:
- 3VP, *2VP, 1СН*, 2VP.
- 3VP, 31СН.
- *3VP, 1СБН*.
- 3VP, 5VP, *2СН with a common top, 5VP*.
- 3VP, *5VP, 1СН*.
- 3VP, *2СН, 5ВП, 2СН, 1ВП*.
- *4СН, 2ВП, 4СН, 1СБН*.
- *15VP, 1СБН*.
- *2Dc with a common top, 3Dc, 2Dc with a common base, 5VP, 2Dc with a common base, 3Dc, 2Dc with a common top*.
- *2Dc with a common top, 6Dc, 5VP, 6Dc, 2Dc with a common top*.
- *2Dc with a common top, 7Dc, 5VP, 7Dc, 2Dc with a common top*.
Dc - double crochet, sc - single crochet, VP - chain stitch.
The description from * to * must be repeated until the end of the row.
How to change napkin sizes
The technique of alternating stripes of patterns described in the previous paragraph can be extremely useful for craftswomen who want to change the size of the napkin. Individual elements can be repeated as many times as necessary or eliminated completely. An excellent example of how to crochet a napkin from several patterns is the product shown in the following photo.

There is a very wide strip connected by mesh. It is obvious that with its help the expansion of the canvas to the planned dimensions was achieved.
Circular crochet napkin patterns also allow you to combine different patterns. The height of skill can be considered the successful combination of several elements and the creation of your own unique napkin.
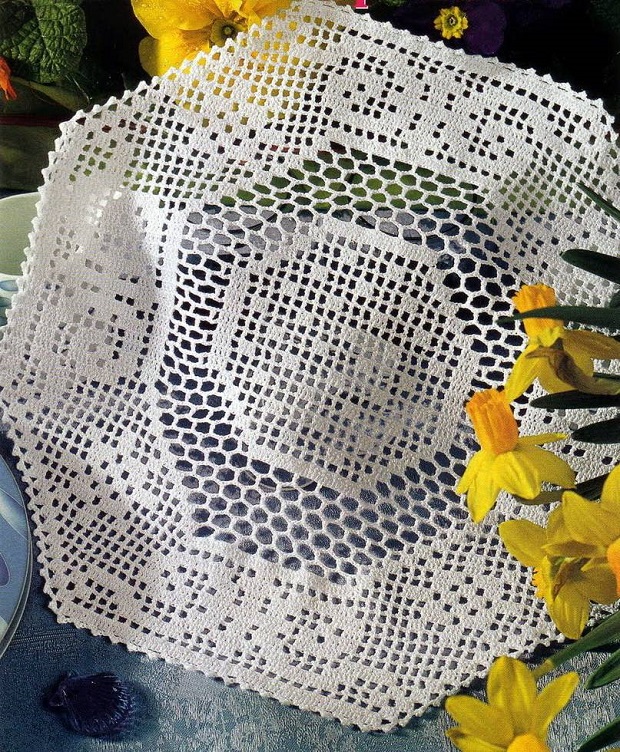
Large circuit and application
A large decorative element such as the one shown in the photo below has an extremely wide range of uses.

In fact, it's not even a napkin, but a real tablecloth. The size of such products depends significantly on the materials that the craftswoman chooses. The thicker the thread, the larger the napkin, but the pattern also looks rougher. Knitted from dense threads with tight twist, such a large crocheted napkin (the pattern is proposed below) becomes an interesting carpet, umbrella, blanket or bedspread.
If desired, you can complete only part of the circuit. By moving to the final binding immediately after the central part, you can get a napkin of a smaller diameter. The small motif without binding becomes convenient for use in pullovers, tops and bags. quite often placed on the yoke knitted dress or on its side.
For convenience, the napkin diagram is divided into two parts.

Central fragment.

And two stripes of patterns with binding.
Description: crochet napkins
Start by setting up a chain of eight air loops. In the second row, perform 16 single crochets, and then continue knitting in accordance with the pattern.
The central part of the pattern contains the very popular “pineapple” elements. Here they are arranged in several rows and greatly decorate the napkin. “Pineapples” are good for expanding fabrics, which is why they are so often used in napkin patterns. The first section of the diagram ends with several rows of mesh, on which a simple pattern of “bushes” will then be placed. This geometric pattern is formed by systematically filling some grid cells with “bushes” of four double crochets. If you need to remove any element of the circuit, excluding this strip will be the most convenient.
The final part of a large napkin
The main decor of this large napkin is the wide border running along its edge. The peculiarity of the scheme is that several patterns are combined here:
- Simple triangles made of “bushes” against the background of chains of air loops.
- Double crochet zigzag stitch.
- Small "pineapples".
- Empty fillet mesh with cells of different sizes.
All these ornaments are arranged simply masterfully. The beginning of one pattern is performed simultaneously with knitting the previous one. Thus, the developers managed to organically incorporate such seemingly different ornaments.
The patterns of formation of circular patterns and the principles of making decorative fabrics described in this article will be useful to those who are looking for information on how to crochet a napkin. Of course, it’s calmer to follow a detailed plan, but only improvisation can give you the feeling of true free creativity.
Crochet napkins are simple and beautiful for beginners with diagrams and descriptions: ideas, photos
Crocheting napkins is an activity that can captivate both beginners and experienced needlewomen.
The article presents various patterns for knitting napkins with a detailed description of the work.
 Crochet napkins
 Crocheted napkins are an extraordinary beauty, the embodiment of lightness and tenderness. The craftswomen who create these magical woven snowflakes don’t just knit napkins, but give those around them a real fairy tale.
To learn how to knit napkins, in addition to a hook and a ball of yarn, you will need patience and attention. It is important that the needlewoman can correctly read the diagram and convey the pattern in her work.
IMPORTANT: You can knit a small napkin with a light pattern in a few hours, but creating a masterpiece with a complex pattern will take much more time.
For beginning needlewomen, it is better to first knit small-sized napkins with simple, uncomplicated patterns. When your hands get used to the new work, and the loops and posts become slender and even, you can move on to performing more complex elements.
In descriptions and explanations of diagrams, the following generally accepted abbreviations are often used:
- VP- air loop
- PS- half-column
- WITH- column
- RLS- single crochet
- S1H- double crochet
- S2H- double crochet stitch.


Video: Simple crochet round napkin
How to choose threads and crochet a simple napkin for beginners: diagram with description
Experienced craftswomen choose spider-thin yarn for their work. Deftly using crochet, they knit napkins of extraordinary beauty that look more like lace. However, those who are just learning to knit should not start with thin threads.
- To prevent the thread from getting tangled, choose medium thickness yarn. Wool blend and acrylic Perfect for first jobs.
- Thread color choose depending on the interior in which the finished napkin will be used.
- Hook size usually corresponds to the thickness of the thread. But if you need the knitting to look tight, take a thinner hook if you want to get the product large knit– choose a thick hook. To begin with, it is better to take a hook number 1.5. If it turns out to be inconvenient to work with, it can always be replaced with a thicker or thinner one.
- For the first napkin, choose one of the most simple circuits - better finish simple work than to quit a difficult one.
IMPORTANT: If you need to knit a thin openwork napkin, use bobbin cotton threads and a hook No. 0.5 - 1. For napkins of medium thickness, you need “Iris” threads and a hook No. 1.5.

Tutorial for crocheting a simple napkin:
Prepare a hook and thread, study the knitting pattern.

Since the napkin is round, start knitting from the center. Knit a 12-loop chain.

Tie the ring according to the diagram.

Connect last stitch with loop air chain, thus completing the circle.

Go to second row. Knit 3 chain stitches, 4 double crochets into the stitches of the previous row.

Repeat the pattern.

Do not connect the last loop of the row with the first; if you connect them, the pattern will be broken.

In the third row, according to the diagram, alternate 4 chain stitches with 6 stitches + 2 double crochets. Knit the 4 middle columns so that the hook enters the base of the columns from the knitted row, knit the first and last so that the hook goes under the chain of chain loops of the knitted row.

Complete the 3rd row, like the previous one, proceed to knitting the 4th row.

In the fourth row alternate 5 chain stitches with 8 stitches + 2 double crochets.
Fifth- alternate 9 chain stitches with 10 stitches + 2 double crochets.
In the sixth- alternate 11 chain stitches with 4 stitches + 2 yarn overs, 11 chain stitches, skip 2 stitches of the previous row, 4 stitches + 2 yarn overs. At the end of the row, connect the last loop to the first.

In the seventh row knit 5 chain stitches, 15 stitches + 2 double crochets. Insert the hook under the chain stitches of the previous row. Then 5 air loops, a column under the air loops of the previous row.

At the end of the row, knit 6 chain stitches and connect the last loop to the first.
 Knitting a napkin, connecting the loops at the end of the 7th row
 In the eighth row knit 6 chain stitches, double crochet + 2 yarn overs, small picot of 4 chain stitches.


At the end of the work, fasten from the wrong side and carefully cut the thread. The work is finished, the napkin is ready!
Video: Crocheting napkins for beginners according to the pattern
How to crochet a beautiful white openwork napkin: diagram with description
Openwork napkins look great both on serving and coffee tables. They can be placed under candy dishes, cups, plates or fruit vases.
To make the napkins look light and delicate, take thin cotton threads and a thin hook (0.5 -1.2).
IMPORTANT: For experienced needlewomen It is advisable to use bobbin threads, and beginning craftswomen should take into account that working with them is very difficult and time-consuming.

Description:
Knitting the middle part:
- Cast on 10 air loops and connect them into a ring.
- 1 row: Knit 3 chain stitches (this will be a rise), 21 stitches + 2 double crochets.
- 2nd row: Tie 6 chain stitches, 1 stitch + 1 yarn over into the 2nd stitch of the previous row, 3 chain stitches.
- 3rd row: 5 air loops, 1 stitch + 1 yarn over (thread for the chain of the 1st row), 2 air loops, 1 stitch + 1 yarn over in the stitch of the 1st row, 2 air loops.
- 4 row: Knit 6 chain stitches, 1 single crochet stitch and 4 chain stitches.
- 5 row: Using connecting stitches, move the thread under 1 arch, knit 7 chain loops, 1 single crochet, 5 chain loops.
- 6th row: Start knitting again from the middle of the arch, knit 8 chain loops, 1 single crochet, 6 chain loops.
- 7th row: Move to the center of the arch, to do this, knit 9 chain loops, 1 single crochet, 7 chain loops.
- 8th row: Start from the middle of the arch. Work 3 chain stitches, 4 stitches + 1 yarn over, 3 chain stitches, 1 stitch + 1 yarn over into the next arch. Next: 3 chain stitches, 9 stitches + 1 yarn over. At the end you should get 4 stitches + 1 yarn over.
- WITH Rows 9 to 16: the pattern is similar to row 8, but carefully monitor the change in the number of columns in each row.
- Row 17: Pull the connecting thread to the last column. Knit 3 chain stitches, 4 stitches + 1 yarn over, 10 chain stitches, 5 stitches + 1 yarn over, 10 chain stitches.
- 18 row: Turn the napkin and knit in the reverse order: 3 chain stitches, 15 stitches + 1 double crochet under the arch, 1 single crochet in the stitch that is in the middle of the previous row, 16 stitches + 1 double crochet.
Every flower knit separately:
- Connect 8 air loops with a ring.
- 1st row: 3 chain stitches, 14 stitches + 1 yarn over.
- 2nd row: 12 chain stitches, 1 single crochet in the 6th stitch of the previous row, 10 chain loops, 1 single crochet in the 11th stitch of the previous row, 10 chain loops.
- 3rd row: Knit the petals by turning the product over. 2 chain stitches, 1 single crochet under the first arch, 1 single crochet, 13 double crochets + 1 crochet, 1 single crochet under the 2nd and 3rd arches.
IMPORTANT: When tying the third petal of the flower, do not forget to connect it to the middle part of the napkin. Tie and connect all the flowers in this way.
Knitting borders- the final stage in the work. The border consists of 7 rows:
- 1st row: 2 chain stitches, 9 single crochet stitches, 8 chain stitches, 10 single crochet stitches in 2 flower stitches. Then do the same over each flower.
- 2nd row: 5 chain loops, 1 stitch + 1 yarn over in 3 stitches above the petal, 2 chain stitches, 1 stitch + 1 yarn over in the next 3 stitch, 2 chain loops, 1 stitch + 1 yarn over in the last stitch above the first flower, 8 chain loops. Continue on each flower as well.
- 3rd row: 3 chain stitches, 7 chain stitches + 1 yarn over, 2 chain stitches, 8 chain stitches + 1 yarn over, 2 chain stitches.
- 4th row: completely repeats the 3rd row, however, if the knitting begins to “pull”, you can add air loops yourself (it will be enough to add 1 loop each).
- 5 row: 3 chain stitches, 7 chain stitches + 1 yarn over, 10 chain stitches, 8 chain stitches + 1 yarn over, 10 chain stitches.
- 6th row: turn the knitting, knit: 3 chain loops, 15 stitches + 1 crochet in the arch of the previous row, 1 single crochet between the stitches of the previous row, 16 stitches + 1 crochet in the next arch, 1 single crochet.
- 7th row: the entire row is tying the resulting elements with single crochets.
Finish the work by securing the thread and removing the remainder.
Beautiful crochetedheart shaped napkin- great gift dear person for Valentine's Day. Several identical small heart napkins can be used to create a romantic setting or for table settings.
Crocheting a heart napkin is not difficult. It is enough to carefully study the diagram, choose the right yarn and hook and follow the recommendations from the description in your work.
To knit a heart, use a thin cotton thread and a No. 1 hook. Finished product size: 15 x 20 cm.

Description of the circuit:
- Dial 10 VP, connect with a ring.
- Collect another 50 VP.
- Connect the last 50th loop with the 10th from the end so that you get a ring.
- 1 row: 3VP (needed for lifting), 19С1Н (tie the ring with them), 3С1Н tie on three loops of the chain and three air loops that were knitted for lifting. Next, knit C1H from each stitch of the entire chain. In the center of the chain, knit 3C1H on two loops. This will form a corner of the heart. Tie the rings at the end of the chain with C1H, connect the PS with 3 loops of the chain.
- 2nd row: 3VP connect the PS with three columns of the previous row, turn the napkin. Further according to the scheme: C1H in every second loop of the previous row above the rounding, above the straight element - in every third. Knit 2 chain stitches between the stitches. When you reach the corner of the heart, tie the arch 6 VP. Finish the row by connecting the last stitch with the 3rd loop of the chain.
- 3rd row: Connect 3VP with 3 columns of the previous row using PS. Turn the napkin and then knit according to the pattern C1H, one above each column of the previous row and 2C1H in the arches above the straight section. In the arches above the curves, knit 3C1H. In the corner of the heart - 12C1H. Connect the last column at the end of the row using a PS with 3 loops of the chain.
- 4 row: complete repetition of row No. 2.
- 5 row: repeat row No. 3, only knit 2C1H over the arches and curves, and 10C1H in the corner.
- 6 row: C1H, 1VP, pico, 1VP. Connect the rings when tying the second one: 1 VP, 1 RLS, 1 VP.
The result should be a heart like this:

You can connect 2 of these napkins together. You will get a cute composition:

This is one of the easiest options for knitting a heart-shaped napkin, which even a beginner can knit on his own. Experienced craftswomen can choose more complex patterns.
Video: Crocheted heart. How to crochet a heart. Master Class
To crochet a square napkin measuring 25x25 cm, you will need 20 g of cotton yarn and hook No. 1.
 How to crochet a white openwork square and rectangular napkin: diagram with description
Description:
Main motive (repeated 16 times):
- Tie a 10 chain chain. Connect into a ring.
- 1st row: 1 VP for lifting, 15 sc in the ring, end of the row using PS.
- 2nd row: 3VP for lifting, 1 PS1N knit together with the last VP of lifting into the 1st lifting loop, 2PS1N knit together into the next RLS of the previous row, 5VP, 2PS1N knit together into the next RLS of the previous row, 2PS1N knit together into the next RLS of the previous row, 5 VP. Repeat 8 times. Finish the row with a connecting post.
- 3rd row: 4VP for lifting, 3S2N into the arch from 5VP of the previous row, 4VP, 4S2N into the same arch from 5VP, 4VP, 1 RLS into the next arch from 5VP of the previous row, 4VP, 4S2N into the next arch from 5VP of the previous row, 4VP , 4С2Н in the same arch from 5VP, 4VP, 1СБН into the next arch from 5VP of the previous row, 4 P. Repeat only 4 times. Finish the row, as before, with a connecting column.
- Next, continue working according to the diagram of the main motif, ending the rows with connecting posts.
- Connect the finished elements together, starch ready product and leave to dry.
IMPORTANT: To get a napkin from rectangular motifs, knit not 16, but 20, 24, 28 or more repeating elements and connect them together in a certain order.
Filet knitting or fillet knitting(loin lace) is the creation of a grid, some cells of which remain empty, and some are filled. The drawing is created in a certain way, depending on how the grid cells are filled.
Fillet knitting is very simple, and the patterns are easy to read and resemble cross stitch patterns. The elements of fillet knitting patterns, as well as patterns for cross stitch, are black and white checkers, circles and crosses. Moreover, an empty cell in the diagram is always indicated by a white cell, and a filled cell can be indicated by a black cell, a cross, or a circle.
IMPORTANT: Before you start knitting a fillet napkin according to the chosen pattern, knit a small sample of 10 by 10 squares, from which you can evaluate the type and density of future work.
Knitting cells is done as follows:
- Empty – S1N, 2VP
- Filled - 3С1Н.
Any fillet knitting starts with a chain of VP.
Calculation of loops for casting:
For 1 cell – 3VP chains + 6 loops to form 1 cell of 1 row. In order not to carry out calculations, you can knit a chain of arbitrary length and start knitting cells from the beginning. Then the extra loops of the chain can be unraveled, and the missing ones can be tied up.
Video: Sirloin mesh. Adding and subtracting cells. Crochet.
IMPORTANT: The place from which work begins (starting point) is marked with an arrow on the diagrams.
Sometimes work on a fillet napkin starts from the bottom or the top. Often work begins precisely from the center, and from there it moves down and up. When you have to knit a voluminous loin, you can knit individual parts and elements, and then knit them together.
IMPORTANT: In order for a napkin knitted with fillet knit to be neat and dense, the loops must not be “loose” or stretched, otherwise the work will be uneven and the pattern will be blurred.


Knowing the decoding of the circuit (empty - С1Н, 2ВП; filled - 3С1Н), you can immediately start working.
Video: Napkin using the fillet technique. Knitting secrets
How to crochet a beautiful white openwork napkin, oval, round: diagram with description
Openwork napkins not only decorate the table, but also add solemnity. Intricate weaves of thin white threads openwork patterns look like fairy-tale aerial webs. To create magical thin napkins, a needlewoman will need good knitting skills, as well as patience and perseverance, because the work uses the thinnest threads and quite complex patterns.
Craftswomen who are good at crocheting and can accurately bring to life knitted patterns and designs can begin making openwork round and oval napkins, the diagrams of which are presented below.


Video: How to knit a round napkin “Delicate patterns”
To knit an openwork oval napkin according to the pattern presented below, prepare hook No. 1 (maximum No. 1.5) and thin yarn of the “Violet” type.


How to crochet a beautiful New Year's napkin with Santa Claus: diagram with description
With your own help knitted napkins You can decorate your home in an original way for the holidays. For example, knitted napkins with Santa Claus may become unusual New Year's decorations, and even present such beauty to friends or relatives as a souvenir for New Year will be quite appropriate.
 How to crochet a beautiful New Year's napkin with Santa Claus
 In order to knit a napkin with Santa Claus, you will need:
- threads of 5 colors (red, green, white, pink, black), but of the same thickness
- hook No. 1 – 2 (depending on the thickness of the selected yarn)
- beads
 How to crochet a beautiful New Year's napkin with Santa Claus, diagram
 Description:
- Knit 6 heads of Santa Clauses according to the pattern:

- To do this, close 5VP into a ring, then tie 20C2H. In each of them, knit 2C2H.
- To create the white side, knit 4 chain stitches. Add 1 row of 4 ch to each chain.
- Knit the hats according to the pattern, tie the hats together with the Moroz faces with green thread.
- Knit a napkin according to the pattern using green yarn.
- Attach Morozov to a napkin, sew eyes, a nose, and tassels onto caps for each of them.
Sunflower napkin so bright and sweet that even just looking at her lifts your spirits, because she reminds you of a warm, carefree summer and bright sun.

IMPORTANT: Working on such a napkin will seem fascinating to an experienced craftswoman and will require attention and patience from a novice craftsman.
To work you will need:
- Cotton yarn type SOSO, two colors (black and yellow)
- Hook No. 1

Description:
- Close 8VP with a ring.
- 1 row: In the center of the ring – 20С1Н.
- 2nd row: In each loop of the base C1H, dividing from 1VP.
- 3rd row: C1H in each base loop.
- 4 row: In each base loop, 2C1H, separating them with 2VP.
- 5 row: In the arches of 2VP, knit 2С1Н, 2ВП, 2С1Н.
- 6th row: repeat 5th + 2VP.
- 7th row: repeat 5th + 3VP.
- 8th row: repeat 5th + 4VP.
- 9th row: repeat 5th + 5VP.
- 10th row: repeat 5th + 6VP.
This is where the knitting of the black center ends. Carefully secure the end of the black thread and proceed to work on the sunflower petals.
IMPORTANT: It’s not scary if the middle turns out to be a gathered wave. Subsequent rows and further steaming will correct this.
Knitting in yellow:
- 11 row: Fasten the thread and knit into the arch of the previous row of 2VP: 2С1Н1, 2ВП, 2С1Н, 5ВП, 9С2Н, 5ВП.
- 12 row: 2С1Н in the arch of the previous row, 2ВП, 2С1Н, 4ВП, 9С2Н + VP in each loop of the base of the petal from the columns with 2Н of the previous row, 4ВП.
- Row 13: 2С1Н, 2ВП, 2С1Н, 4ВП. Then tie 8 arches from 4VP into each vertex of the previous row, 4VP.
- 14 row: complete repetition of row 13, except for the number of arches from 4VP. There will be 7 of them here.
- 15 row: Knit as row 13, only there will be 6 arches from 4VP.
- 16 row: 2С1Н, 2ВП, 2С1Н, 2ВП, 2С1Н, 4ВП. There will be 5 arches here.
- 17 row: Knit a petal: in the extreme arch of the last row, knit 2С1Н, 2ВП, 2С1Н, 4ВП, 4 arches, 4ВП, 2С1Н, 2ВП, 2С1Н.
- 18 row: 2S1N, 2VP, 2S1N, 4VP, 3 arches, 4VP, 2S1N, 2VP, 2S1N.
- Row 19: 2С1Н, 2ВП, 2С1Н, 3ВП, 2 arches, 3ВП, 2С1Н, 2ВП, 2С1Н.
- Row 20: 2S1N, 2VP, 2S1N, 2VP, 1 arch, 2VP, 2S1N, 2VP, 2S1N.
- 21 row: 2С1Н, 2ВП, 2С1Н, connect with the arch of the previous row, 2С1Н, 2ВП, 2С1Н.
The work on the petal is finished. Carefully cut the fixed thread.
Craftswomen who are not yet confident in their abilities can first knit a small sunflower napkin using an easy pattern, a detailed description of the work on which is in the video.
Video: Sunflower motif
Even a beginner can knit a delicate chamomile napkin, because the scheme of work is quite simple and understandable.


Video: Napkin Chamomile. Master Class
How to crochet a small white napkin in the shape of a snowflake: diagram with description
You can quickly and easily crochet a small white napkin in the shape of a snowflake. Such air napkins can turn into Christmas decorations, New Year's decor or cute souvenirs. Also, interconnected snowflakes will serve as an original tablecloth for festive table.

Scheme of work:

Description:
- Connect the thread with a ring and tie 1 ch for lifting.
- 1 row: Tie 8 sc into a ring, tighten the ring, tie a connecting post, and insert the hook into 1 sc post of this row.
- 2nd row: 3VP for lifting + 2VP according to the diagram. Next, tie 1C1H into the next loop, then 2VP, into the next loop 1C1H, again 2VP.
- 3rd row: 1 connecting column, 2VP, 3S1H with a common vertex, 5VP, into the next arch 4S1H with a common vertex, 5VP, continue knitting until the end of the row. Close with a connecting post, inserting the hook into the common vertex.
- 4th row: 1VP instep, 1SC in the same loop, picot from 3VP, 1SC in the same loop, picot from 5VP, 1SC in the same loop, picot from 3VP, 1SC in the same loop, 3VP in the common top. Continue in this manner until the end of the row.
- At the end of the work, cut the thread.


Video: Knitting snowflakes in 5 minutes. Crochet. Master Class
Beautiful volumetric napkin with violet flowers It will work if you attach several multi-colored violets to a white crocheted openwork base. You can take a napkin of any shape and size, so the main task is to learn how to knit violets for decoration.

Violets can be knitted in several ways. Let's look at one of the easiest:
- Take the middle (preferably from yellow yarn) from 4 VP, close it into a ring.
- Knit 10 sc into a ring.
- Attach a thread of a different color. These will be the petals.
- Knit a circle on the first 2 stitches.
- 1 row: 3C1H in each loop.
- 2nd row: 2dc in each column.
- 3rd row: Dc in each column.
- 4th row: make 3 decreases - at the beginning, middle and end of the row.
- 5 row: make the same 3 decreases, cut and fasten the thread.
- Also tie the remaining 4 petals.
- Tie the entire flower with a thread of a darker shade.
The result of the work should be a flower like this:

You can knit violets using the following patterns:

Video: How to crochet a violet flower
The “Lady” napkin, one of the most unusual and original, which will undoubtedly arouse admiration among friends and acquaintances, is actually very easy and quick to knit. “Ladies” can be of any colors, sizes and shapes, but each of them can decorate a home and lift your spirits.

 Original napkin "Lady"
 Detailed description of work on one of the "Ladies":

- Start with the cap. For convenience, turn the diagram upside down.
- Cast on 13VP, knit 3 rows in stitches, knit VP1N between them.
- After tying the hat, break the thread.
- Knit the upper part of the body with double crochets.
- Separately tie your arms and torso.
- Attach your hands to the skirt on the 11th row.
How to crochet a voluminous napkin: description, diagram
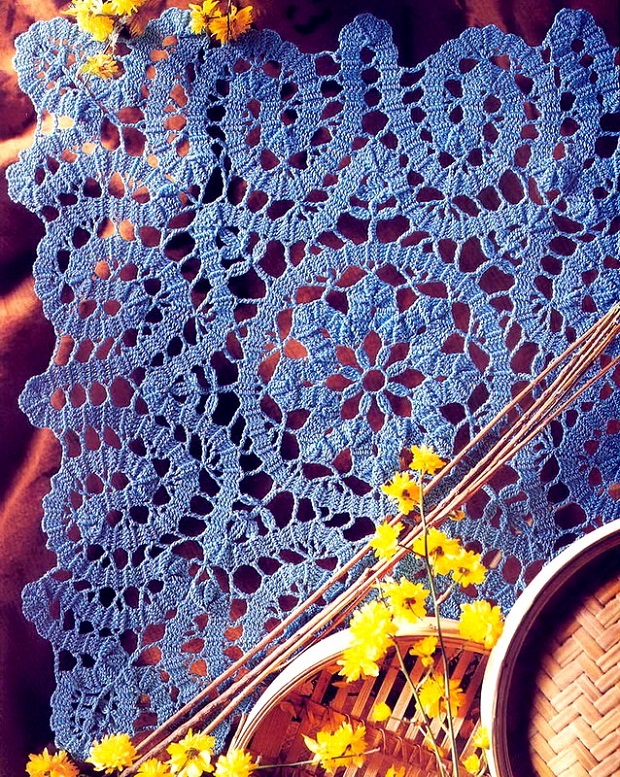
Elegant, light, voluminous two-color napkins not only look impressive, but are also very easy to knit. The “trick” of such napkins is their two-color nature. Similar plain napkins can get “lost” in the interior, and certainly won’t attract as much attention.
To work, you will need thin cotton yarn and a No. 1 hook.

The “base” of the napkin is knitted according to an easy pattern using single crochet stitches and a VP between them.

It makes no sense to describe this process in detail.
But knitting butterflies is very similar to knitting flowers.

This diagram you will have to change it a little, otherwise the butterflies will turn out very large. Therefore, future butterflies will be knitted in single crochet stitches.
- Make a ring from 6VP.
- 1 row: 8 groups of 3C1H and 3VP between them.
- 2nd row: Turn the knitting and knit: in the arches of the previous row 2 times, 5C1H and 5VP between them.
- 3rd row: 1СБН between two groups of columns of the previous row.
- Tie the arches: 7С1Н, 2ВП, 7С1Н.
- 4 row: RLS.
The result will be a flower with uneven, curled petals. But by bending it in half, you get a beautiful voluminous butterfly in flight.
Place the butterflies on a napkin, securing them with a thread and a needle, and enjoy the beauty and tenderness of your own creation.
How to crochet a large napkin for a table: description, diagram
Big crocheted a napkin can decorate a table in a living room, hall, nursery or kitchen. This original and beautiful product can give comfort and warmth to your home. Of course, it is difficult to decide on such a large job, but its result will certainly please the craftswoman and justify the effort and money spent.
Making your home comfortable is an important task for women. Today knitted ones are coming back into fashion openwork napkins for home or cottage. They will add a touch of sophistication and tenderness to any interior. The napkin does not have to be white; the choice of color and shape is always in the hands of the needlewoman. In this article we will look at crocheting napkins with patterns and provide a description of fabulously beautiful napkins for home and garden. It is important to choose the right knitting threads and a suitable pattern in order to realize your idea.
Usually napkins are knitted from thin cotton. The traditional option is white cotton, measuring at least 300 meters per 100 grams.
But today it is not necessary to choose white or milky color for crocheting a fabulously beautiful napkin, patterns and descriptions of such napkins are further in the article.
Many thread manufacturers hand knitting They offer thin cotton in different shades. Among Russian companies you can choose Pekhorka " Baby cotton", "Summer", iris of any company. The thread from Vita “Pelican”, “Iris”, Alize “Miss”, YarnArt “Violet” is good in work.
Choose the color yourself, to suit the interior and to your taste. Universal, classic options There will be white, milky, cream, pale pink.
Today, microfiber napkins are also knitted. For napkins made from this thread, thin yarn is used. This could be Tulip yarn from YarnArt, viscose silk from Gazal and others.
To knit a napkin, you should choose a thin thread and small hook. A hook number from 1 to 2 is quite suitable, depending on the thickness of the yarn and the idea.
The finished cotton or microfiber napkin should be washed and dried horizontally, laid out on a flat surface on a towel or any fabric. Afterwards you can iron it. Some people starch napkins, but today you can skip this or make a weak starch solution to give the napkin a clear shape.
Patterns for crocheting napkins with descriptions
One of the traditional shapes for a napkin is a circle. Let's take a closer look at several models and patterns of crocheted round napkins, they are all fabulously beautiful and airy, such napkins will decorate any interior.

Option 1
A napkin with rays radiating from the center is a very delicate and cute option. This pattern is not difficult to knit; even a novice needlewoman can handle it. But the result will amaze with its beauty. For this napkin you need to take thin cotton and a small hook.

Start knitting from the center, like all round napkins. We do this:
- We collect 6 air loops and close them in a circle. We knit three air loops for lifting to the next row. This way we will move to the next row each time.
- We knit another 19 double crochets into the resulting circle and close it into a circle with lifting loops. In total we get 20 columns in a circle.
- Next we knit according to the pattern below.
When the napkin is knitted, we tie it with openwork arches of air loops with picot. We do picot like this: we thread a thread into the loop of the previous row and knit 3 air loops. We fasten the picot into the same loop of the previous row. It turns out to be a small loop.
Option 2
Very interesting option napkins with knitted feathers. This pattern is obtained by alternating arches from air loops and double crochets.

Let's start knitting:
- We close 3 air loops in a circle and knit 3 lifting loops for the next row.
- We make 11 double crochets in a circle and close them with lifting loops.
- Next we knit strictly according to the given pattern.
- The last row of the napkin, according to the diagram, consists of arches of air loops. If desired, you can make them with pico.
Option 3
A napkin with spikelets is an excellent option for decorating a country room. For its implementation, a diagram is given below. We start knitting by casting on 12 air loops and closing them into a ring. Next we knit 3 lifting chain stitches and another 27 double crochets into a ring. Next we follow the diagram.

Option 4
An amazing airy napkin with an unusual pattern can decorate your interior. It knits easily and quickly, the main thing is not to lose track of the air loops. It is the air loops and chains of them that form this mysterious and unusual airy napkin pattern.

To get started you need:
- Cast on 12 air loops and close them into a ring.
- Tie the resulting ring with 22 single crochets.
- We knit the next two rows with the same number of single crochets.
- Next, we move on to a series of chains of 21 air loops. We knit the last arch in the row from a chain of 10 chain stitches and a stitch with 9 crochets. The next row goes to the tops of the resulting chains.
- Next we knit according to the pattern.
Option 5
Crocheted napkin made from the finest gossamer with knitted flowers - unusual and fabulous nice option napkins, the diagram of which is given below.
To perform this you will need very thin cotton. You can take a regular bobbin thread and the thinnest hook No. 0.5 or 0.25.

Option 6
A very beautiful napkin with a pattern of lush columns. They are performed as 3 double crochets from one loop of the previous row with a common top. We knit according to the pattern, starting from a ring of air loops.

Option 7
A napkin with a star in the center, which consists of lush columns. There are openwork fans along the edges. Knitting is also done from the center from a circle of air loops.

Option 8
Napkin in the shape of a sunflower. Very beautiful and tender. Knit according to the pattern given below.

Option 9
Another openwork beautiful flower. Maybe a sunflower, it is made of double crochets and arches made of air loops. Knit according to the pattern given below.

Option 10
An amazingly beautiful napkin with bunches of grapes radiating from the center. Each berry in the bunch is knitted from lush double crochets.
They are made from one loop of the previous row. We knit 5 double crochets with a common top. This is how we get a lush column. We knit according to the pattern from the center.

Option 11
Very beautiful napkin white cotton. Its highlight is the rounded fans, which are located closer to the center and along the edges of the napkin.
To knit this napkin, it is better to use thin mercerized cotton, which holds its shape well.
We start knitting from the center and follow the pattern given below.

Oval napkins with diagrams
Oval napkins look no less interesting and beautiful than openwork round napkins. They are knitted from the center according to the pattern.
But then they diverge along the edges with an increase in volume and elongation of the pattern.
Napkins can contain the same elements as round ones: fans, arches made of air loops, lush columns, pineapples and so on.

It is important to follow the diagram for each specific model. Several diagrams for oval napkins are given below.
A very interesting version of a napkin is an oval napkin consisting of circles connected by a web of air loops.
In order to make such a beautiful and interesting napkin, you need to knit three large circles according to the patterns below or according to any patterns of openwork circles.
Then we tie the napkin with a wide border according to the given pattern.
Napkin made of elements
A napkin made of interconnected hexagonal elements looks stylish, beautiful and gentle.
To perform such a fabulous work, we need to knit the first hexagonal element according to the given diagram.

After the entire number of hexagons required for the napkin is knitted, we tie the edges of the napkin according to the pattern given below.
Napkins using fillet knitting technique
Fillet knitting is a special crochet technique, the principle of which is to knit empty or filled cells.
The filled cells form a pattern. It could be a floral pattern, animals, graphic pattern, people and so on.
Using the fillet technique you can knit any item, including beautiful napkins.
The main thing is to understand the principle of fillet knitting. We start by casting a chain of air loops of the length we need. Then we knit the cells.
The classic version is an empty square made from a double crochet, 2 chain stitches and another double crochet. A filled cell is 4 double crochets.
The last double crochet of one square is the first double crochet from the next square.
Filet knitting patterns are usually drawn with checkered patterns, the pattern is painted over dark color and the cells are used to read the picture and knit the pattern.
Mainly napkins fillet technique knit in the shape of a square or rectangle with a set of chain stitches. Knitting from bottom to top. But there are patterns that allow you to knit a fillet napkin in a circle from the center.
We start knitting as for a regular napkin with a ring of air loops and several double crochets of the second row, knitted into this ring.
The article contains diagrams for such napkins. In fillet knitting, the main thing is to maintain the exact number of empty and filled cells. Using the fillet knitting technique, you can also make borders for fabric napkins.
Good afternoon
And again about napkins. If last time I imagined creative ideas, then today I offer you classic, very beautiful two-color crochet napkins with patterns.
In addition, in recent days I have been selecting interesting crochet napkins and posted several new patterns:
- in the corresponding article "",
- as well as a new large one with a simple circuit,
- I found the diagram mysterious,
- added a few.
So, if you like to knit napkins and tablecloths, you can take a look and knit something new.
Crochet pink napkin
For this delicate two-color napkin you will need 10 grams of pink Iris yarn, 5 grams of white Iris yarn, hook No. 2.
We start knitting with a white thread from a set of 8 VPs and close them into a ring.
1st row: 3VP, 19 S1N.
2nd row: 5VP, *1S2N, 1VP*.
3rd row: 4VP, 1S2N, 1 VP, *2S2N, 1VP*.
4th – 10th rows: continue knitting according to the pattern with white thread.
11th – 14th We knit the rows with pink thread according to the pattern.
The napkin pattern is not very clear, but I found the only one in a magazine, so I placed another pattern for a similar napkin, all the rows of which are knitted in the same way, only they seem to be repeated twice. By the way, such a white napkin is also very impressive, but you can knit it with the addition of pink yarn.

I continue the description according to scheme 1 for the pink napkin.
11th row: fasten a pink thread into the arch of 3 VPs of the 10th row, 20VP, connect the 20th loop with the 8th, 7VP, RLS into the arch of 3 VPs of the 10th row, * 9VP, RLS into the arch of 3 -x VP of the 10th row, 19VP, connect the 19th and 7th loops, 7VP, RLS into an arch of 3 VPs of the 10th row *, 9 VP, finish with a connecting post.
12th row: 1 connecting post for the transition to an arch of 6 VPs (beginning of the loop) of the 11th row, 1 VP rise, 4СБН in an arch of 6 VPs of the 11th row, 17С2Н in a loop, 5СБН in an arch of 6 VPs 11th row, * 11 sc in an arch of 9 VPs of the 11th row, 5 sc in an arch of 6 VPs of the 11th row, 17C2H in a loop, 5 sc in an arch of 6 VPs of the 11th row* , 11СБН in the arch of 9 VPs of the 11th row, finish with a connecting column.
13th row: connecting posts for the transition to the 1st S2N of the 12th row, 4VP lifting instead of the first S2N, 1VP arches, * 17S2N, between S2N 1 VP, 2VP transition, 1SBN in the 6th SBN arches from 11 SBN 12 rows *, 2VP, connecting column with the top of the first C2H of three VPs.
14th row: connecting columns for the transition to the 2nd C2H of the 13th row, 4VP of lifting instead of the first C2H, 1VP of the arch, * 14 C2H, between the columns 1VP each *, finish with a connecting column at the top of the first C2H of their 4 VP.
15th row: fasten the thread white at the top of the second S2H of the 14th row, * 4VP (2VP instead of the first S1H, 2VP - arch between S1H), * 13S1H, between the columns of the 2VP arches *, 2VP, finish with a connecting column at the top of the first S1H from 2VP.
16th row we knit with pink thread: connecting stitches to the top of the first C1H of the 15th row, 1 VP rise instead of the first RLS, picot from 3 VP to the top of the first C1H of the 15th row, 2 SBN in the arch of 2 VP of the 15th row, * 1 RLS to the top C1H of the 15th row, picot, 2СБН in the arch of 2 VPs of the 15th row *, 2VP, finish with a connecting column in the first SC of 2 VPs.
Additionally, decorate the napkin with knitted flowers and leaves.
You can use this scheme:

Crochet green napkin

Materials for a two-color napkin with a predominant green: Iris yarn in green and white and hook number 2.
Knitting such a napkin consists of several parts.
Part A.
First we knit a ring in two rows of green.
In the 3rd row we attach a white thread and knit the 3rd - 10th rows in a circle according to the pattern.
Separately, with a green thread, we knit 12 leaves according to the pattern in reverse rows and during the knitting process we attach them to each other and to the round white part of the napkin.
Knitting a leaf
We collect 9 air loops.
- 1st row: 7SC (we knit the first stitch on the 3rd loop of the chain), 4VP, then turn the knitting and knit 6SC on the same chain on the other side.
- 2nd row: 2VP, 5SC for each column of the previous row and 2SC for the arch of air loops, 3VP, and in reverse order: 2SC for the arch of air loops, 6SC for each column of the previous row. One column of the 1st row remained unknitted.
- In the 3rd - 10th rows, knitting is similar to the 2nd row. Look at the diagram for the location of the columns in relation to the previous row: in each row the number of columns increases by one, while the column of the previous row is not tied to the outside of the leaf.
In the 10th row between the two halves of the leaves there are not 3, but 1 VP.
Separately, we knit 12 green circles, attaching them to the leaves.
Part B.
We knit a green transverse path according to the pattern, attaching it to the leaves and circles.
Part C.
We attach a white thread and finish knitting a napkin in the 11-12th rows.
If you liked two-color crochet napkins, write in the comments.
Yulia Vyrskaya sent her wonderful work, she even crocheted 2 of these beautiful two-color napkins and made adjustments to the knitting description, since during the knitting process it turned out that the magazine description was somewhat inconsistent with the photo of the napkin. I am very grateful to Yulia for her attentiveness and for sharing her experience with us.
For a long time, a television, carefully covered with a napkin, remained one of the main attributes of any Soviet housing. Times are changing, and now it is rare to see a woman who decorates her home with knitted napkins. However, seeing such a decoration in someone else’s house, each of us admires the talent and skill of the craftswoman. So why not continue the tradition of knitting beautiful things that will bring new, interesting accents to your home? Crochet napkins– what could be simpler? Especially if there is an article with diagrams- things work out simple but very beautiful!
How to understand a knitting pattern?
Crocheting napkins using a crochet hook is really simple, but the working pattern is not always clear. We invite you to look at this picture - the main symbols that are most often used when weaving are deciphered here.

Knitting in circles
The simplest and most classic knitting is circular weaving. The patterns of such napkins, as you can see, are very simple - the main thing is to know symbol and have at least some experience.
As you can see, many patterns with German text are an echo of those times when it was possible to find a way to knit a beautiful thing only in German magazines. And now such napkins can be knitted using patterns from the Internet - what could be more accessible and simpler?


By the way, many needlewomen use patterns for knitting lace doilies to create interesting and unusual large items - for example, tops or dresses.
Figured napkins
DIY knitting crocheted napkins with patterns taken from our article will be excellent, simple and beautiful solution for non-standard surfaces. After all, it often turns out that you need to decorate part of a piece of furniture. A round napkin has its drawbacks, and then you should pay attention to such figured things. They are the ones who show your taste and ability not only to knit, but also to decorate the surrounding space.


Patterns for napkins in the style of fillet knitting
Using a hook you can knit such unusual, but incredibly beautiful napkins:


Experienced knitters know that this technique is called “loin knitting” and any item is knitted very quickly and simply, although you cannot tell this by the excellent result. Amazing job! Try to surprise your family and guests by decorating your home with these napkins.
Bruges lace for napkins
There is such an interesting way of knitting napkins using a hook. Of course, this will not be easy for beginners, but more experienced craftswomen can easily find master classes describing this technique on the Internet. We suggest you admire the options for napkins that you can knit yourself (and they look as if they were machine knitted!). For lovers of Bruges lace, we also offer quite simple patterns.


Napkins with the spirit of Ireland
We have already told you a little about Irish lace . Crochet napkins with patterns knit using this technique Just, but the thing turns out very beautiful. Such natural motifs will be an excellent addition to any interior.