We have collected a selection of interesting ideas that you can use at home. Very diverse, but quite applicable.
An ordinary egg tray can be used for every little thing. In this case - for sewing accessories. And if you also decoupage it, it will also be very beautiful.
How do you like these original candlesticks? I think it looks very vintage!


If you have little space, but you really love flowers, then this vertical gardening option is just for you!

This is how you can decorate a wall with flowers in an original way, and if the bottles are also of an original shape, then you will get double aesthetic pleasure.

And this option of planting moss in thimbles looks very interesting and vintage. It is quite possible to assemble a composition on a window or on a table by adding more miniature objects - a figurine or pebbles. Just a flight of fancy!

Wicker baskets in the form of a bedside or sofa table look very original. They are also a place to store something.

An interesting arrangement of shelves will enliven the interior and will not take up much space.

I really like this pillow design! Simple and tasteful. And the use of unnecessary buttons.

Here's how you can decorate your wall with photos! Without making extra holes in it and having the ability to constantly change the exposure.

Another option for placing photos seemed interesting - on the clock.

Original uses for drink bottles are pepper shakers and salt shakers. You can take it on a picnic.

A very convenient sponge holder - whether in the kitchen or in the bathroom.

Also from plastic bottles You can make this convenient holder for kitchen items on the back of the kitchen cabinet door.

An original fruit bowl made of wire - both beautiful and convenient.

You can use a grater to store jewelry - very glamorous!

A regular clothes brush will allow you to keep your cosmetic brushes and tassels in order.

Here’s another option for storing brushes, and it’s also fragrant!

And now a little original jewelry walls


If you choose interesting wallpaper, you can make your interior unique!


Several ideas with a convenient arrangement of shelves under the sink and using a table from sewing machine as a base for a sink.


In small apartments, women also want to have a dressing table. This folding option is just a godsend!

A couple more ideas for folding furniture - for the kitchen, for the hallway, for the balcony.


Also, for the rational use of space, I liked the idea of placing shelves behind the TV this way.

And also partitions in a combined toilet - inside the partition you can arrange a cabinet for medicines or cosmetics, and also arrange shelves for storing towels, bathrobes or linen. And another extra surface can be used as an additional shelf for accessories or decorations.

Curtains and drapes also like to flaunt accessories not worse than girls. Now about the hairpins that can be used to pin up curtains during the day.


Well, and finally - very relevant before Easter! You can sprout wheat or any green grass and place the colors on the holiday table in an original way.

Well, I’ve shared my favorite ideas with you with the hope that someone will find some of them useful! Happy holiday to you - Happy Palm Sunday!
You really want your house to look stylish and expensive, but doing this with your own hands is actually easier than you might think. From the most ordinary, and sometimes unnecessary things, DIY crafts for the home look great.
Expensive furniture, works of art, modern gadgets will undoubtedly make your home look luxurious, but sometimes very little money, a little creativity and neatness are enough to get an interior that looks expensive and stylish, and all this attractive splendor is very inexpensive.
If you want to put your hands and soul into decorating your home, here are some ideas on how to do it.
DIY crafts from jars
Use jars to organize small items such as cotton balls, ear buds, and bath salts. This useful decor is ideal for a bathroom or bedroom. The jars may be the same or not, this is not very important here. The important element here is the handles. These are furniture handles. When I visit hardware stores or furniture workshops, it is difficult for me to tear myself away from display cases with handles; I am especially attracted to transparent ones in the form of crystals. It truly looks luxurious. I always regretted that I didn’t have furniture where I could attach such luxury.
And here it is, a godsend for beautiful hands. Naturally, the lids on the jars originally came in all sorts of colors, but they were painted with simple white spray paint. And the luxurious handles were glued with metal glue.
From bottles
Such an exquisite decoration of the simplest bottles can be made using decal paper with transparent film. Of course, first the bottle needs to be painted desired color, and then start decorating the surface.
You need to find an interesting pattern that suits your interior in shape and color and transfer it to the surface of the bottle. The design is printed on decal paper for a laser or inkjet printer.

By the way, such paper is called differently. Decal paper, gummed paper, decal and even transfer paper are all the same thing.
Then, the drawing is cut with scissors and lowered into the water. After 10-12 seconds, the picture will separate from the substrate. You can watch the video, a very interesting way to accurately transfer a design to the surface of a cup.
Read the guidelines for printing on decal paper carefully. Find out the paper type for your inkjet or laser printer; in the printer settings, check whether the paper type is specified correctly. Before applying to the surface, it must be degreased with alcohol. The treatment liquid must not contain acetone. Dry the applied design with a hairdryer or in the oven. Attention! The oven temperature should not exceed 150 degrees.
After application, coat with acrylic matte or glossy varnish, depending on the purpose of decoration.
With this paper you can make drawings that will last for many years, such bottles and vases can be washed, nothing will happen to them.

Anyone who has a creative streak is sorry to throw away empty “glass containers”.
And this is a right regret, because even the simplest glass bottles look magical in the interior.
Serving napkins
Great idea! I talked about this exquisite decoration at home in the previous article about. And I liked Lyudmila Sanzharovskaya’s comment that such table setting gives status to the owners of the house.

From newspaper and magazine tubes
I never thought that such practically free material would be so flexible. I was a guest at a children's creative center with a surprisingly cute name “White Rabbit”. The hostess showed me the children's handicrafts, I was amazed, here is a dish woven from newspapers. After all, you can’t tell it from a vine. This dish will be varnished, it will not be afraid of water, and it can be used perfectly in the kitchen or in the garden for fruit.

This craft requires more skill and experience. But, as they say, the worst is the beginning.

Stylish crafts made from cord
Nice natural color Cotton cord is a favorite material for DIY crafts. Flower pots and organizers look elegant and noble, especially in combination with brightly colored tassels made from floss threads or natrul materials such as leather.


You can make rugs and baskets from scraps. But if the rugs can be made only from shreds, cut into ribbons and tied together into one thread for knitting. It is better to make a basket on a cord around which the shreds are wrapped. The basket should keep its shape. You can put tangles, scraps and everything a needlewoman needs in her handicraft corner.

From an old sweater
You can make a craft box look stylish using just an old sweater that no one wears anymore.

Book holders
I found such a cute guy on the Internet, I already have an article about holders, but it’s hard to pass by such a charmer. Regular stone, is so skillfully painted and does its functional task so well. Although in the article about holders the idea of a silver or gold polyhedron looks very expensive, the painted stone looks very nice and homey.

Beans and brushes for stylish crafts for the home
This proposal looks more like a life hack, but it looks so stylish that I decided to place this photo in crafts for the home. The truth about “making” here is only the process of pouring beans into a transparent vessel of suitable size.

Crazy Shred
A wonderful technique for crafts for the home - crazy patchwork or crazy patchwork. The good thing about this technique is that all kinds of fabric scraps are used. Every girl who sews more or less has somewhere a treasured bag with scraps and leftovers. Using the technique of real, academic patchwork Special attention paid to the selection of fabrics. They even sell sets. But there are no restrictions in this technique and it is easy to do.
Here, a guest of my site, Luda Strakovskaya, shows how to sew a potholder using this technique, everything is simple and clear.
In fact, potholders are a very necessary and beautiful detail of the kitchen interior.

But there are also options for this technique in the living room. Decorative pillows for beauty, comfort and as a cohesive color element of the interior.

A scattering of puzzles
I don’t know about you, but I have a huge number of puzzles that have migrated from one box to another, got mixed up, rearranged, and now it’s no longer possible to assemble anything worthwhile from them. And here it’s so nice and nice idea for children's.

Crafts from buttons
This is a classic of the genre. Anything can be made from buttons, and there is practically no person who does not like to look at buttons. And in hardware stores there are always crowds of people near the scattering of buttons sold at discounts.
Recently I went into a store, there was a table with high sides and inside there were piles of various buttons that were left in the store one or several at a time, leftovers and illiquid items. A special scoop is stuck into the slide; you can pick up buttons directly with the scoop.
Mom and daughter, daughter, about 5-6 years old, are collecting buttons in bags, their faces are happy, overjoyed. I ask what you will do with them. Mom, hurriedly, - Oh, we don’t know yet.
I really want to see what they came up with with their buttons.
Maybe such beauty, for example.

Cinder candles
Candles are always needed in the house. To create a romantic mood, for relaxation and release from the negative energy of the past hard working day, and, of course, for cases when there is an emergency power outage in the house.
Oh, this incident is perhaps the most favorite in our family. Especially when the children were little. Everyone pulls up to the kitchen, the kettle is turned on, the candles are lit and moments of happy family unity begin. It would be nice if everyone’s phones were dead by this time.
After such gatherings, a decent amount of cinders remains, or rather, this amount depends on the time needed by the emergency service to fix network problems.
The cinders need to be melted and poured into cups left over from sets or for some reason not used for their intended purpose.

Or you can make the “cup” itself from the same molten mass.

More ideas for a wooden nursery
A kind of stadiometer, or rather an age meter made of wooden square planks, will decorate and allow you to observe changes in the size of the hand of the owner of the room.

Well, or just decorate a children’s room on a budget, involving both kids and adults in the creative process.

Friends, decorating your home with your own hands is a pleasant thing when ideas have been formed and all that remains is to select materials and tools for crafts. When your soul is rushing and you want both this and that, there is no need to rush. I hope this article helped you decide, or at least was simply useful.
Pleasant little things made with your own hands most often become the main factors in creating home comfort. Many of them are not difficult to make - all you need is sleight of hand, a little imagination and creative inspiration.
The interesting things collected in our photo selection not only please the eye, but also make life even more enjoyable. Let’s quickly start reviewing exciting DIY things.
Rug of stones
Let your interior be one step closer to nature. This cute DIY rug made from large pebbles will make a bright, natural decor - a great alternative to the traditional rug at the entrance.

Mug with gold accent
Have you been dreaming of transforming your favorite mug? Stop putting off your plans for later. Buy a special aerosol with golden paint and start creating soon. There can be many design options - be creative or follow the original example in the photo.
Lampshade made of lace
You are unlikely to find the likeness of this lace lampshade in any store, because such a masterpiece is the result of manual creativity and craftsmanship. The essence of the work is shown in the photo.

Paper cut: evening city on a shelf
It’s not at all difficult to create real magic in your home. This spectacular fairytale castle lantern is cut out of paper. Even your child can do this technique.

For the craft, prepare the following materials:
- thick paper;
- scissors, pencil, ruler, eraser, breadboard knife, glue stick;
- New Year's garland (preferably battery-powered).
- a shelf for a picture (necessarily with a side that will hold the picture).


We bend the edge of the layout to install it on the shelf. We lay a garland along the bottom and light the lights. The fairytale castle with lighting is ready!

Kitchen organizer
Kitchen devices made with love by you look much more interesting than their store-bought counterparts. With them, the environment around is filled with a special warm atmosphere and comfort. Even such a simple cutlery organizer made from tin cans will add some personality and charm to the interior.

Cardboard frame for mirror
Get creative with your vanity design. Instead of a boring classic mirror, you can hang something more original above it, for example, a mirror with an openwork cardboard frame. Believe me, such a DIY masterpiece looks much more refined than its store-bought counterpart.

City story from cable
Add a touch of unpredictability to your interior. A long black cable lying chaotically near a white wall can turn into an original minimalist urban plot against its background.

Vintage photo frame
An antique frame from a stray picture and simple wooden clothespins are a great material for creating a unique vintage-style photo frame with a creative approach to design.

Charging point in box
If you are one of those who have accumulated a lot of chargers, we have for you the perfect solution for an aesthetic and at the same time functional box for storing them. Not only does it visually brighten up the room and keep all your devices organized, but it also charges them on the spot!

Book with kisses
A creative surprise for a loved one - a mini-book with kisses. As you flip through the pages, there are more and more hearts.

An accessory for toast lovers
You can make this cute toast yourself. A nice gift for the occasion.

Shoes with cats
Add a little more color to your daily routine. Old ballet shoes can be transformed in an original way by decorating the socks with charming cat faces.

And you will need very little: plain ballet shoes, a brush, black and white paint, a white marker, masking tape. Further everything follows the instructions in the photo.


A soulful winter accessory
Homemade decorative skates will once again remind you of a winter fairy tale and relaxing at the skating rink.

If you want to make the same ones, then prepare large pins, felt, cardboard, wool threads for laces, hot glue, a marker and a tapestry needle.


A little humor on a rainy day
Comic covers on rubber galoshes will certainly not allow you to feel sad in rainy, cloudy weather.

Adorable prickly hedgehog
A sewn hedgehog made from yarn can also have needles, but not your own, but sewing needles.
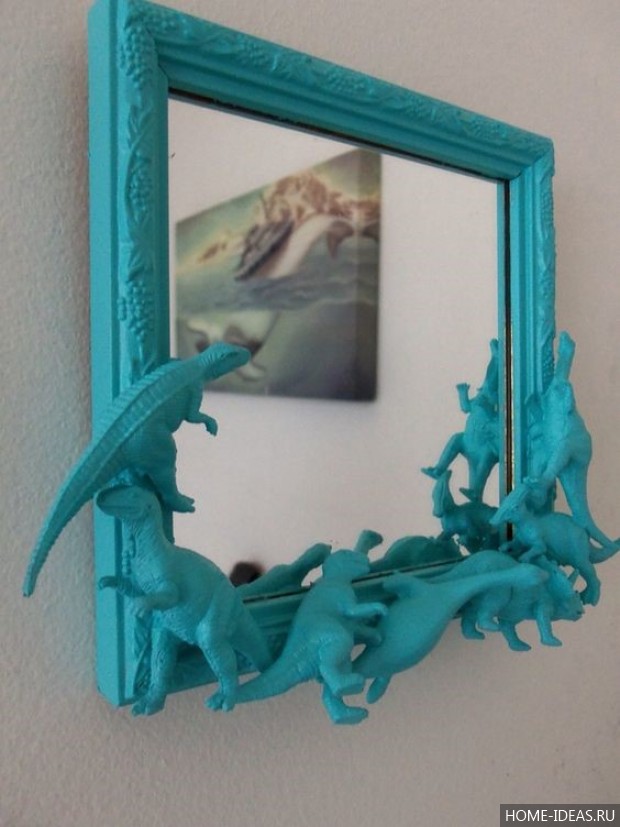
 Funny abstractions
Feel like an abstract artist by building bright smiley faces from different miniature figures.

Cute kittens made of cardboard for storing threads

Handmade stamp collection


Children's bunny bag
Why buy accessories for your child if you can make them yourself. A bag for a girl with a bunny face looks very original.

Ice cream garland
Create a summer mood by tying a garland of the most popular delicacy at this time - an ice cream cone.

Notebook in homemade leather binding

Stylish hanger
Loops made of leather ribbons nailed to the wall - an extraordinary minimalist hanger or shelf for books, magazines and other small items.


Magic vase
You can create a magical atmosphere in your home with the help of simple, beautiful things, such as this vase.


Rhinestone bracelet


Decorative letters for the refrigerator or children's chalkboard
Learning alphabet letters are a great idea for home decor. All you need is a little gold paint.


Convenient headphone clip

Spectacular shimmer
Candles with golden and silver shimmer will add a little palatial feel to the interior. This beauty can be made at home using old candles and aluminum tape.

Donut Bracelet
Young Homer Simpson fans will love this adorable donut bracelet. All you need here is bright nail polish and a plastic children's bracelet, then all you have to do is get creative with the glaze.


Not boring clothes
A simple hat will significantly transform your everyday style. It is enough to sew a few bright flowers along its edge.


T-shirt with scoop neck

Watercolor sweatshirt

Beach pareo dress

Headband

Braided scarf

A simple white T-shirt will become more stylish if you sew on it a neat pocket with an interesting print.

More ideas for DIY crafts are presented in the following selection of photographs.


As you can see, in order to please yourself and your loved ones, you don’t need to spend a lot of effort and money. Your desire, creativity and inspiration can work wonders. And the result of work done with your own hands cannot be compared with purchased accessories and other store-bought items.
Do you like to do handicrafts? Tell us about your favorite creative masterpieces.
My home is my castle. Yes, that's what they often say. But you and I are not living in the Middle Ages, our fortress should not be an ordinary house, but a cozy nest, where everything is beautiful and comfortable. In this article, we will look together at various ideas for decorating rooms that you can do with your own hands without much expense.
Hallway
Even the simplest entrance area can be made functional and stylish. Wood paneling will bring a fresh touch to the interior. Not only is it simply beautiful, it is also convenient. On the panel you can screw hooks for bags and jackets. You can also make a small shelf on top for useful little things.
There is also an interesting solution for small apartments. Shoe rack, hooks and cabinets can be combined into one organizer.

Regular front door You can also make it a stylish element using wooden diapers.

To keep your shoes out of the way and not dirty anything, you can make an unusual stand from a wooden box and stones. So even after a walk in the rain, your hallway will remain clean.

By the way, instead of pebbles, you can use an artificial mat made of plastic grass.
An old ladder can be used as a shoe rack. Now all the shoes will be at hand.

For a couple of years now, it has been fashionable to make all sorts of household items from wooden pallets. In the hallway you can use them as shoe stands. You can make a shelf on top for small items or just put flowers, and attach hooks for umbrellas on the sides.

There is a small life hack for pet owners. To keep dog or cat bowls out of the way, mount them on a separate shelf in a closet or under a countertop.

Surprise your guests with a non-standard approach to such an ordinary thing as coat hooks. Wooden slats, branches, screws, a little imagination and voila! The unusual hanger is ready.

Bathroom and toilet room
These premises should, first of all, be comfortable. However, one should not forget about beauty. After all, everyone is pleased when the necessary things are at hand, when there is no need to untangle the wires from the hair dryer or rush around looking for ear sticks. We offer several simple ways organization of space.
An old closet drawer or shutters from a flea market can be turned into a toiletry holder.

And old floorboards can be used in wall decor. It looks unusual, but is very simple to do: the slats are either glued to the wall or screwed with self-tapping screws. They can be painted, varnished or otherwise decorated on top.

Nowadays it is very possible to use jars to serve drinks and dishes. Why not use them in decoration? You don't have to look for those same Mason jars that the whole Internet is crazy about. Any others will do.

We are all accustomed to towels hanging on hooks and taking up quite a lot of space. Use shelves to store bath accessories. And it’s convenient, because you can put something else on the shelves, and it’s beautiful.


Now it has become very possible to use stone to decorate a bathroom. They cover the walls and decorate the bathtub. You can even make a rug out of pebbles! Just don’t forget the rubber base in this case so as not to scratch the floor.

To avoid the hassle of separating your laundry before washing, make a rack with several storage baskets at once. Baskets can be painted in the color of the laundry for which they are intended.

By the way, about washing. Tired of plain white washing machine? Paint it. All you need is permanent enamel and a stencil. The latter can be made from masking tape.

Living room
Getting a stylish shelving unit quickly and inexpensively is no problem. Use wooden boxes. They can be arranged as you need, making shelves various sizes. There is another plus - you can put together such a cabinet with your whole family and have a lot of fun.


Using the same principle, you can make a desktop. You will need modular shelving from Ikea, a table top, slats, screws and some paint. The number of shelves and the shape of the entire table depends on your needs.
In general, the use of wood in the interior is one of this year’s highlights. Wooden pallets, parts from old furniture, ladders, branches, etc. are used.


Hanging shelves will help make your living room more interesting. You can use both ropes of different diameters and belts.


A cornice is always a very expensive pleasure. But if you have a non-standard window and only need to order the appropriate size, then it turns into a complete pain. The simple solution is to use small-diameter plastic water pipes. You just need to paint them in a color that suits your interior.

Another life hack on the topic of curtains. How to decorate a window without using a cornice at all? You will need a wooden lath and a lot of hooks for clothes. Don't forget to sew the loops to the curtain.

You can zone the space in different ways: walls, screens, curtains. There is another way - jute cords. You can use any other materials like ribbons or colored fishing line.

Bedroom
Garlands and photographs will help you decorate your bedroom walls in an unusual way. But you don’t need heavy frames with glass or any special things for this. Photos can be posted on fishing line, string, or directly on the wall using double-sided tape. And single-color garlands will create an atmosphere of comfort and romance.


Shelves of unusual shape will add freshness to the interior.


Great idea for girls to organize their decorations. You will need branches, cords and decorative nails. The latter need to be stuffed onto branches at the required distance and hung on the wall with laces.

The new is the well-forgotten old. It's the same with decor. You don't have to buy a new chest of drawers or cabinets when you have an old one. You can simply paint it. And then your favorite thing will serve you for many more years.


To save space, there is one very simple “trick” - a shelving wall. This will help get rid of most of the closets in the room.

Add some magic to your bedroom with cotton clouds and garlands.

An old ladder can serve not only as a clothes hanger, but also as a library shelf. This solution seems strange, but just try it - it's really convenient.

Most important element bedrooms - bed. A large double bed is a dream. However, such a thing is often expensive. Don't despair, because making your own bed frame is not at all difficult. Using wooden slats of different thicknesses, self-tapping screws, saws and stain, you can make the bed frame exactly the way you want.

Kitchen
The kitchen is the most visited place in the house. Making it functional and comfortable is quite easy, and now we will look at several examples of rational organization of space that will not only help to restore order, but also make the room more comfortable.
To keep spatulas, spoons, forks and knives out of the way on the countertop, use jars. If you paint them, it will be great.

In small kitchens, you need to make the most efficient use of space. Hidden shelves and built-in wardrobes are your best friends in this case.
Even in the cabinets themselves, you can organize the space so that you can fit more. Internal shelves can be mounted not only on the walls, but also on the doors. It seems like this simple idea, but how useful.

Life hack: to prevent lids from pots and pans from taking up much space, use regular plastic towel hooks.


There is always one problem with deep boxes - it is difficult to get to what is in the depths. The solution is simple - round rotating shelves. All products are visible and easy to get.

We are all used to the fact that spoons, forks, etc. are stored vertically in the kitchen drawer. What if the box is too small for, for example, a rolling pin? Diagonal placement of sectors will allow you to fit everything.

So that all the spices are visible and do not get lost on the kitchen countertop, make a stand with a ladder. On the top tier you can place small pots with herbs such as parsley, dill, cilantro or basil. Now everything is at hand.

Corner sofas and kitchen islands can also be assembled with your own hands. Moreover, you can think of places to store kitchen utensils in them. Not only will no one have such furniture, but it will fully meet all your needs.


One of the very convenient moves in the kitchen is the use of magnetic tape. You can store knives on it, as well as spices in jars with metal lids. Great idea to save space on your kitchen counter.

And your favorite mugs can be hung on regular hooks. Both stylish and comfortable.

Who said that when we grow up, we part with our toys? There's no need to do that. You can use small figurines to decorate your interior. They will be able to find new life as magnets, stands, handles or anything else you come up with yourself.


It would seem that you can do with such an ordinary thing as a refrigerator. We all like to put notes on it with reminders. What if you write on the refrigerator itself, and with crayons? You just need to paint it all with special paint for chalkboards and enjoy. By the way, this technique works on any surface.

Yard and garden
When decorating your home, you shouldn’t forget about what’s outside. Let's start with the entrance area. From concrete blocks and a couple of wooden slats you can make a cute and comfortable table where flowers, a watering can, a lantern or anything else will live.

By the way, you can make various benches from concrete blocks, decorate flower beds, build a barbecue, and even make flower pots. It all depends on your imagination.


You can also make stylish ottomans and armchairs with your own hands. You need old tires, liquid nails and thick rope. The finished structure can be painted in any color. These ottomans are suitable for both indoors and outdoors, because they don’t mind rain.

Boxes or pallets made of wood can serve as the basis for a garden cabinet. Here you can store various flower accessories, pots, watering cans and other tools. And if you leave a flat work surface on top, you can make something or replant flowers.

What could be unusual in a flower pot? It would seem - nothing. However, here you can surprise everyone. Plant succulents in a birdcage. When they grow, it will be very beautiful. And instead of a regular hanging pot, you can use an old chandelier.

An ordinary children's inflatable pool can be used as a sofa. Just put a blanket or blanket inside and cover the sides with pillows.

It’s so beautiful to use candles in the garden, but they are constantly blown out by the wind. To prevent this from happening, you can make candlesticks from empty tin cans or ordinary glass ones. You can decorate everything with stones or ribbons if desired.


These, of course, are not all ideas for home and garden, only a small part of what you can do with your own hands. You just need to not be afraid to experiment and fill your home with cute and beautiful things.
To keep you in a great mood in any weather, make new things from available materials. Quick crafts that take less than an hour to make.
The content of the article:
Sometimes you want to pamper your child with a new toy, but you don’t have the financial resources or time to make one. Therefore, we decided to select for you the fastest simple crafts, on which you will spend no more than an hour. The family budget will not suffer, since they are made mostly from waste material and all sorts of leftovers.
How to make a doll from threads and a dandelion with your own hands?

You will create it while relaxing in a cozy chair. The main thing is to place everything you need nearby so that you don’t have to get up again. This:
- threads;
- half a sheet of cardboard;
- scissors;
- strip of flesh-colored fabric;
- markers.
- Wrap the threads around the card in an impressive layer.
- Tie the finished winding with thread. Determine where the doll's head will be. Mark it by also rewinding it with thread.
- In the same way, design the right and left hand. To make a doll's hands from threads, wrap your hands at wrist level and cut the yarn in the area of the toy's fingers.
- Also use threads to separate the torso from the legs, and perform them using the same technique as the arms, just make them longer.
- Measure a strip of flesh-colored fabric according to the volume of the head, glue its sides.
- Wind hair threads around your hand and cut through the resulting roll on one side. Glue to the head, trim the bangs if desired.
- Use markers of different colors to draw facial features.
- Sew a sweater for a toy or tie it with a piece of fabric to make an apron. You can tie a handkerchief to make it a cloak. Children are happy to make such clothes, and they will certainly appreciate a new doll made from threads.
If you are making a girl doll, then you do not need to mark her legs. Let the threads cut evenly at the bottom become a skirt.
Such simple crafts will surely delight the kids. You can also create a fluffy dandelion from leftover threads.

For this charm you will need:
- yellow and green yarn;
- wire;
- PVA glue;
- knitting fork or metal staple;
- scissors;
- gypsy and thin needle.
- Wind the yellow yarn around a crochet fork. Thread a thread of the same color into the gypsy needle. Sew it down the middle.
- Lubricate the resulting line well with glue. Remove the created fabric of yarn from the fork and roll it with a roller.
- A thread is wound in the middle to give the workpiece a dumbbell shape. Coat the middle of this part with glue on top and wait until it dries.
- Such simple crafts are interesting for both adults and children. They are made quickly, but part of the time is spent waiting for the glue to dry. Therefore, it is better to make crafts in the evening, and continue the entertaining needlework the next day. What are we going to do now?
- Cut the resulting dumbbell in the middle. On the first and second flowers, you need to cut the loops with scissors and carefully comb them to get fluffy caps of two dandelions.
- The green yarn from which we will make sepals must be cut into pieces 4 cm long. We thread the same thread into a gypsy needle, sew the pieces across, but not in the middle, but 2/3 away from the edge.
- Trim the top with scissors, trim it, make another line parallel to the first.
- Lubricate with glue reverse side flower, attach the sepal here. Wrap it with the same thread you used to stitch it. Glue both ends and leave the workpiece to dry.
- Meanwhile, you will wind the green thread onto the glue-coated wire. You will get a stem.
- Insert a thick needle into the sepal from below and twist to make a hole for the stem. Install it there, having previously lubricated this part with glue.
- The leaves can be crocheted, but since we are making simple crafts, cut them out of green paper or cardboard and glue them to the stem.
How to quickly make crafts from animal tissue?
If you want to spend on making new toy less than 30 minutes, then make these funny mice. They don't even need to be sewn. By making the slits in a certain way, you will make these rodents.

See if you have:
- pieces of felt;
- juice straws;
- beads or small buttons.
- For each mouse you need to cut two parts from one fabric. The first will become a body, pointed on the muzzle, rounded on the other side. Cut out the ears in the shape of a figure eight.
- From a fabric of a different color you need to cut out a small circle for the nose and two larger ones for the ears, and glue them in place.
- Scissors or stationery knife Make 4 cuts on the body of the mouse. Two will be vertical, at the back of the head, and the other two you will make in the rump area to place the straw here. Place the ears on the head, threading them through the slits.
- All you have to do is glue beads or buttons instead of eyes and marvel at how quickly crafts are made from simple materials.

If your child is bored, you can make a fabric applique with him. Such funny bunnies are also sewn onto the worn knees of children's trousers to update this item.

Transfer the applique onto the fabric and cut it out. The bunny is decorated by sewing a bow to his ears and a carrot on his body. Attach eyes and other facial features. If this is an applique, then you need to glue the hare onto the cardboard.
And here are some simple crafts - in the shape of birds. You can cut them out from leftover felt, glue on a nose, eyes, wings and perform a home performance.

DIY crafts from pine cones for children

They are also made simply and quickly.
To make gnomes, take:
- Pine cones;
- light plasticine;
- pieces of felt or fleece;
- glue;
- brush.
- Let the child roll a ball out of plasticine, reverse side brushes will make indentations for the eyes, mouth, nose. They will be filled with pieces of plasticine of the corresponding color. So, the eyes can be brown or blue, the mouth red.
- Attach the head to the top of the pine cone. Cut a triangle out of felt and glue its sides together to form a cone. Place this cap on your character's head.
- Cut out mittens from the remaining fabric and attach them to the pine cone with plasticine.

For a craft made from pine cones like an owl, we will also need:
- 2 acorn caps;
- yellow paint with a brush;
- plasticine;
- accessories in the form of feathers, ribbons.
- First, you need to paint the cone and the acorn cap, and continue subsequent work when they are dry.
- Let the child roll small balls from black plasticine and stick them to upside-down acorn caps - these are the pupils.
- Make a nose out of orange plasticine, attach it in place.
- This owl craft made from pine cones is decorated with feathers or ribbon.
- pine cone;
- pieces of thick fabric;
- two toothpicks;
- cotton wool;
- 2 ice cream sticks;
- white paint.
- Let the child paint the pine cone and remove it until it dries completely.
- Mom will cut out a scarf from plaid fabric and tie it around the snowman’s neck. Make headphones from felt and glue them to the character’s head.
- The child will make a snowman’s nose and mouth out of plasticine and attach it to his face.
- Make your hands from wire wrapped in a strip of fabric or ribbon. You need to wrap the wire around the bump.
- Place toothpicks in the snowman's hands, with pieces of cotton wool glued to the bottom of these sticks.
- Paint the popsicle sticks and when dry, place the snowman on these skis.
Quick and easy to make and these are the piglets. Glue the scales from the cones to the fir cones in the form of ears. Attach the snouts that will become the acorn caps. You can use plasticine rather than glue for this.

Paint the piglets pink, you can use spray paint for this. Once it's dry, only then will you attach the little black beads that will become the eyes.
For this craft you need an unopened pine cone. But over time, the scales open up. To avoid this, dip the cones in wood glue diluted with water for half an hour.
Remove them from the solution and shake them off. After 3 days, the cone will dry completely, securing the scales, which will now not open. After this you can cover this natural material paint and make new items.
The next simple craft is a forest corner. For her, take:
- CD disk;
- plasticine;
- spruce and pine cone;
- acorn cap;
- glue;
- paints;
- eyes for toys.
- Paint the disc in green color, draw flowers on its surface.
- Let the child roll the caps and stems of the mushrooms and connect them.
- The base for the hedgehog can be sculpted from plasticine or polymer clay. Then cover it with brown paint.
- When it dries, stick scales from a fir cone into the back of the hedgehog. Place a cap on his head.
- Glue the eyes, nose, mouth, put a cane stick in your hand. In the other there will be a basket with mushrooms, which are molded from plasticine.
- Attach the hedgehog to the stand, after which another wonderful craft is ready.
Tie floral wire to the pine cones and place picturesque flowers in a jar previously wrapped with twine.

You can also make another craft from pine cones for the garden, such as a wonderful decorative basket.

If you need to quickly make a hedgehog to bring to kindergarten, mold his body and head from beige plasticine, and roll his eyes and nose from black. Stick in the seeds, which will become spines.

Simple crafts for a great mood
Now the sun rarely comes out, and the weather is increasingly cloudy. To avoid succumbing to despondency at this time of year, create mischievous tricks that will certainly improve your mood.

Place these cheerful flowers in a vase at home, which can be made from practically nothing. All you need to do is:
- colored paper;
- cardboard from a white box;
- marker;
- stationery knife;
- tape;
- scissors.

Color the eyes with a black marker and bend the petals forward.

Cut a stem from cardboard. At the top, on one side, glue the finished part, on the other, a pre-cut flower with petals.

Fold a green sheet of paper in half, draw an oval line on it, and cut along it. If available, use zigzag scissors. Keep the notches simple.

Tie the paper flowers with a ribbon, and if you have taffeta, then use this fabric for decoration. You have got a bouquet that will never fade and will make you happy.

You can attach flowers with a toothpick to washed beets or pineapple. You will get a beautiful shell for a turtle. You will make her arms, legs and head and neck from carrots. Attach these parts to the body using toothpicks as well.

If you want him to come quickly New Year, decorate white objects in the apartment, turning them into snowmen.

Attach black magnets to the refrigerator, and now a holiday character has taken up residence in your kitchen. If you draw on a white vase or glue Round eyes and an orange nose in the shape of a carrot, then another snowman will amuse everyone gathered at the table.
See what other quick and easy crafts you can make.