Are you just learning the art of knitting and want to create something simple and very useful? A stylish, warm and cozy knitted men's hat is where a young (in other words, not entirely experienced knitter) can begin her creative journey. This product will be a great gift for your husband, boyfriend, son or brother.
In this article we will introduce you to the most current models knitted hats for men, we will demonstrate diagrams with descriptions and photos, and also show simple video tutorials.
“Knitted” fashion 2018-2019 is natural and soft yarn, unobtrusive colors, simple patterns, large knit and comfortable models of hats. We have already told you what they will be like. To create men's hats, we will also show you diagrams and drawings for beginners, we will demonstrate the form o and we will help you choose the right model.  Striped hat knitted in stockinette stitch, suitable for almost any man. A thick elastic band at the beginning of knitting will allow the headdress to stay well on the head.
 Another option for knitting a men's hat is suitable for a novice craftswoman.

 The beanie hat is suitable for both men and women, because she looks beautiful and stylish with any outerwear. We talked about this earlier on the blog and showed a detailed and informative master class. Such a hat will also come in handy in a man’s wardrobe, especially if your man is a fashionista and a fan of casual style.
  Very popular among fans sporty style enjoys hat with zigzag pattern— it makes the model voluminous and warm.
  A knitted cap goes well with a coat or a classic suit. This model will also look natural and beautiful with a down jacket.
 Suitable for men as well as women hat with fancy pattern. True, the pattern should not be too intricate and “feminine”.
 A “cheerful” striped hat will cheer you up in frosty or rainy weather. Contact your to a loved one such a rainbow accessory.
How to knit a men's hat with earflaps?
The modern hat with earflaps is not the archaic fur hulk that was worn a couple of decades ago. This neat, warm and stylish headdress, which your man will wear with pleasure.
A men's earflap hat reliably covers the chin, neck and ears, and if it is topped with woolen threads or faux fur, it will also be extremely warm.
 This hat model is made using knitting needles and crochet, according to the pattern below.
 A chic hat with a pattern will greatly enliven a man's look, which is obviously doomed to be boring, dull and definitely “masculine”. Men also deserve a bright image, and a beautiful hat will be a great start to your fashion journey.


Men's winter earflaps hats are knitted according to the most simple circuits, for example - garter stitch. We will knit this beautiful hat together on straight knitting needles, size 4. For work we will need approximately 100 grams of yarn.

 We will cast on the first twelve loops on a large needle, and having knitted another row, we will begin to decrease a loop on each side. Having reached 20 loops, we stop adding, which should be “crowned” with a round corner (see photo).
 We knit garter stitch 14 rows, in the same 14th row we add 8 loops on one side. Using the main pattern, knit another 20 rows. Make 2 pieces of the same size, with a mirror image.
 For a separate piece, cast on 22 stitches, knitting one row, start adding one stitch on each side until the number of loops reaches 30. In the next 24 rows we knit in garter stitch. Place all three pieces on double needles or long straight needles.
Today they have become extremely popular knitted Ushanka hats. Almost everyone likes them, so women and men wear them with pleasure. Many needlewomen want to know how to knit female and male patterns correctly. But mothers are interested in how to knit a fashionable and warm earflap hat for a little boy or teenage girl. Knitting any of the patterns will not seem too difficult even for beginner needlewomen.
To make any master class on making this type of hat, you will need yarn and knitting needles, as well as diagrams and photos. In addition, you need a little time and a lot of desire to successfully knit any model. Now we will show you the first master class with step by step photos.

Unlike the above photo, in which you see a hat with earflaps knitted with the “Rice” pattern, the knitting of the model in this master class will be done in garter stitch.


This is a men's model, because it is somewhat rough and very simple, without unnecessary reliefs. Before starting knitting, this master class asks you to measure the circumference of your head, which in our case was fifty-five centimeters (cm). For one ear you need to cast on eight units, after which we begin to knit with garter stitch. During the knitting process, we add two loops in each row, at the beginning and at the end of the row (P). Having reached twenty-two units, we will continue knitting with garter stitch without additions, until the length of the ears is twenty cm. At the same time, their width is twelve cm.


In total, we will need to have on the knitting needles the number of Ps, which includes thirty-nine pieces for the front, forty-four Ps for two ears, and thirty-six pieces for the back of the head. There will be a total of one hundred and nineteen units on the knitting needles. First, we cast on half of the rear P, that is, eighteen pieces, then the side loops, then thirty-nine front units, loops of the second ear, and eighteen pieces of the back part. When all these Ps are together on the knitting needle, we knit five rows of them with the main pattern. After this, we will create the desired depth of the earflap hat, that is, fifteen cm. In the upper part, we need to knit a noticeable narrowing of the fabric. The pattern of this narrowing consists of knitting one of the two Ps along the edges of the product in the first row. In the next P we will subtract eight pieces. After completing ten R's we should have fifteen loops that need to be tightened together. The last thing we knit is the lapel of the earflap hat. In front, we cast on thirty-nine loops along the outer row, and use the main pattern to make the desired lapel length. You can knit small curves to improve it appearance. To do this, we knit two Ps together in each row. We make such decreases in the next five rows.

Knitted women's hat with earflaps
The master class shows models of hats for women. In it you will see some photos of models, as well as a video tutorial. Pay attention to the photo, which shows a very fashionable now women's hat earflaps knitted with ordinary knitting needles.

The principle of needlework and the scheme of work are preserved almost exactly as in the manufacture of the male version. In addition, the men's, women's or children's model is very similar because they all have ears and a lapel. Therefore, each of them is performed approximately according to the same scheme. The only differences are the patterns. Among other things, models differ in the presence or absence of decorations. Among them, we note beautiful crocheted flowers, as in the photo below.

Can also be decorated ready product original buttons or a brooch.


Video master class demonstrates knitting patterns for women. It contains a description of the basic “Star” pattern, which was used for the women’s earflap hat. It will require a set of loops that are a multiple of three, plus 1 and plus two edge loops. The vertical repeat of the pattern is four rows. For work, we will prepare two hundred grams of yarn and knitting needles number three. The knitting density is twenty loops in ten centimeters. For each ear we will dial six units, and make additions in the front rows, one on each edge. When the number of P reaches twenty pieces, we knit a length of seventeen cm. After that, we will make a complete set for the entire hat. The first seventeen pieces of the set are intended for half of the back of the head. Then there are the loops of the first ear, thirty-seven units of the anterior zone, the second ear and half of the back of the head. In total there were one hundred and eleven pieces on the knitting needles. Then you need to knit all the loops together using garter stitch, making four lines. After this, we begin the main pattern of the earflap hat. We knit a depth of twelve cm, required for a hat with earflaps, after which we need to knit its upper part, gradually decreasing the loops. Next comes the making of the lapel, for which we collect thirty-five units at the bottom of the forehead area. After casting on, we knit a lapel of the desired length and bind off all the loops. When finishing the needlework, we cut pieces of thread for the fringe, shape it and fasten it at the bottom of the ears. This completes the master class, and the knitted women's earflap hat is completely ready.
Video: Tutorial on knitting a hat with earflaps
How to knit a hat with earflaps for a boy
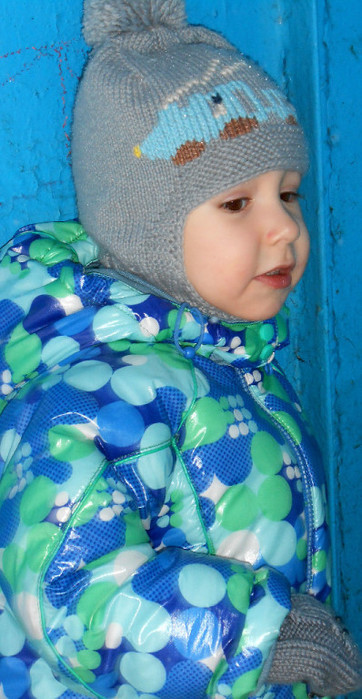
Now we will look at how to knit a children's hat with earflaps. This earflap hat is more intended for a boy, but this is not at all necessary. The earflap hat has a double layer of knitting on the sides. In addition, it has fabric insulation, hemmed on the reverse side. It is suitable for the coldest time of the year. The product is decorated with white trim on the lapel and along the edges of the ears. Against a bright background of blue color The white trim looks great. For needlework you will need two types of mixed yarn, smooth colored and twisted for the lapel and tying the ears. The head circumference in this case is forty-eight centimeters. We carry out the work with knitting needles number five. The knitting technique for this model of a hat with earflaps for a boy differs from the methods that we discussed in previous lessons. To knit the first element, you need to cast on twenty-two loops, and knit a thirty-six cm rectangular fabric with the Arana pattern.

The width of the rectangle is twelve cm. This detail will become the central zone of a boy’s earflap hat, that is, it will form the part of the hat between the forehead and the back of the head. After this, in the center of the fabric we will pick up twelve new units from the edge loops and begin to knit the first ear of the hat. The pattern is the same as in the first part, that is, “Arana”. We knit eighteen cm straight, after which we add a loop on both sides. Next we knit seven cm out of fourteen loops. After this, reduce the loops to eight, and close the row. Now from the last closed P we take the first P of the second layer, and knit everything in a mirror image to make a double fabric. We knit the second ear of the earflap hat in the same way as the first. We fold the parts and carefully sew the hat together. Now all we have to do is tie it with textured yarn using a crochet hook. In the forehead area we crochet the visor using the same textured thread. A boy's earflap hat is decorated with plaits with pompoms. The harnesses are knitted using three knit stitches and sewn to the ears and visor. When you have finished all the binding and made the visor, the hat for the boy can be considered ready.
This model has been in trend for more than one season and, I think, will delight its owners for a long time. Although why only the owners? A knitted earflap hat is a truly universal headdress not only for women, but also for men. This is a warm and stylish thing for boys and girls, youth. The variety of models allows you to knit such a hat that is different from others. It can be a hat with earflaps with or without a lapel. The ears on the hat can be made long, or you can limit them to short, purely symbolic ones. Ties, pompons, trim with the most unimaginable jacquards or arans - all this diversifies the model of a hat with earflaps. But first, learn the principle of knitting such a pattern, understand the essence of constructing and assembling this universal hat, so beloved by many.

To understand how to knit a hat with earflaps, let’s take as an example a master class on making a hat for a woman.
We knit the female model of Ushanka hats
A women's knitted hat with earflaps looks best when made from medium-thick yarn. In addition, we will need:
- a pair of regular straight knitting needles corresponding to the thickness of the yarn (see the recommendation on the yarn packaging);
- a set of double-edged needles (they will be needed later, when forming the bottom of the hat);
- thick needle for sewing knitwear;
- For measuring and calculating loops, use a centimeter tape.
 Depending on the style and decor of the hat, you will have to stock up on additional knitting needles or pins (when making braids), a ready-made pompom, as well as a variety of beads, buttons, etc.
Any master class on knitting a hat with knitting needles of this model is based on the following steps:
- Knitting a sample - knit the sample with the desired pattern, calculate the number of loops, measure the circumference of the head.
- Calculation of the sizes of parts - regardless of whether it is a women's, men's or children's hat, the ear is calculated based on the fact that its width should correspond to a fifth of the entire circumference of the head. The width of the flap should correspond to approximately a quarter of this volume.
- Important: A schematic diagram of the construction of a hat with earflaps is deliberately presented here. However, depending on the chosen model, the ears may be narrower (as, for example, in some models of Peruvian chullo hats) or wider, as in Russian earflaps. Consider individual preferences as well as the width of your forehead.
Knitting ears - they can be knitted one at a time, however, for a less experienced knitter, we recommend starting a couple of ears at once. To do this, from two different balls, start two different ears on one pair of knitting needles. And although such knitting will require a little more attention, the details will be perfectly identical. Ears can be started with three or five loops and knitted using the method of adding to the desired height. Increases are gradually made in each row or, depending on the length of the ear, through a row. This is what the layout of the lugs on the knitting needle looks like:
 Knitting a lapel - this part is knitted after the finished ears are put aside; for this, use additional knitting needles. Having knitted it with regular working knitting needles to the desired height, also put it aside on an additional knitting needle. This is what the drawing looks like:
 Knitting the main part of a hat with earflaps - half the number of loops (hereinafter - P.) of the back part of the product is cast on the main knitting needles. Next, the set aside stitches of the first eyelet and the loops of the finished lapel are put on the same knitting needle. If you plan to knit a hat with knitting needles without it at all, then instead, cast on the same knitting needle as many stitches as you need for the forehead. Then remove the P. of the second eyelet onto the knitting needle and cast on the second P., which will serve as the back side. It should look like this:
 Next, the product is knitted either on five knitting needles (in this case, you can avoid sewing the seam), or on regular knitting needles by knitting forward and reverse rows.
Having knitted the main part, towards the end of the work, make uniform decreases to form the back of the head. If your hat is knitted on two knitting needles, make a knitted seam behind the product. The finishing can be done in any way you like. Below is a video tutorial on how to make a knitted side seam.
Video: Making a knitted seam
As you can see in the photo above, this method of knitting allows you to make a neat continuous fabric from the ears to the top of the product. As a rule, it is in this way that products for women and men are usually knitted. However, a simpler method can be used for children - from the bottom edge of the finished cap, stitches are collected for the ears and lapel. Next, the lapel is knitted as usual, and the ears - with a decrease. As a result, knitting turns out even easier than in the first case. One small minus is that the connection line will be a little noticeable. However, this does not spoil children's hats.
Original hat with earflaps for women
It would be wrong not to introduce you to another simple method of making a hat with earflaps. You can see it in the photo:
 In this model, in addition to the main knitting needles, a hook is used - it is used to finish the lapel. The hat is made of bouclé gray yarn and white regular yarn.
The “trick” and simplicity of this model lies precisely in the fact that the imitation of earflaps is achieved by tying it to a previously knitted hat lapel and back, that is, the second, rear, lapel.
The simplest master class for such a cute hat:
- make a calculation of P. based on the head;
- in two threads, dial the required amount of P.;
- knit 12 cm upwards with garter stitch (you already know how this knitting is done - knit stitches are knitted on both sides of the product);
- To decorate the bottom of the hat, divide the fabric into 8 wedges, then continue knitting, decreasing one stitch in each wedge in every second row. When there are 10 stitches on the knitting needle, pull them together with thread and secure the tip;
- Using gray thread in two folds, cast on the loops for the lapel along the bottom edge of the cap - in front along the width of the forehead. After knitting 10 cm, close the lapel loops. From the remaining stitches of the cap, pick up the back lapel with gray yarn folded in half and knit 10 cm in this way. Fold threads of different colors and tie the lapels. To do this, use a crochet hook and single crochet.
Below is a video master class on such a harness.
Video: Learning to tie an edge
And a photo of the wiring diagram:

Video: Knitting a hat with earflaps with a braid pattern
Hat for men and boys
Men's knitted earflap hat compared to female models more dense, so to speak, a little brutal. The essence of knitting is the same - with separate production of ears, lapels, and assembly of parts together. But this hat has more coverage at the back of the head. Look what it looks like in the photo:

The master class of this model is as follows. Cast on the required number of stitches and start knitting the ears. They can be either square, as in the photo below, or with beveled edges. Please note: increases are made in every second row on both sides of the edge of the part.
Having knitted the desired length of the eyelet, do not put it aside immediately on the knitting needle, but knit half of the occipital area: the second photo below clearly shows how this is done:
 The third and fourth photos show the lapel set. Make it according to the size of your forehead. Having knitted the desired height, collect all the loops in this way: one eye, lapel, second eye.


To knit the bottom of the hat, we outline the wedges, as in one of the previous descriptions, then we evenly decrease the loops along the edges of the wedges, knitting a pair of loops together. When there are 15 loops left, tighten them with thread. We will secure the lapel on the front side. The men's hat is ready.
We knit a hat for a boy in the same way. A knitted earflap hat for a boy can be decorated with various designs, appliqués, and thematic pictures. So, for a boy, a jacquard in the form of pilot’s glasses or a variety of fur pom poms, ornaments:


A boy’s hat can also be decorated with buttons, appliqués, etc.:

Knitting a hat with earflaps for a girl gives even more scope for creativity and imagination, however, classic earflaps with a visor-lapel for little girls are still used less often than for a boy:


How to knit a hat for a boy?
With the onset of the first cold weather, the issue of purchasing warm clothes for children becomes urgent. But can anything be warmer than children's jumpers, sweaters, mittens or hats knitted from natural yarn? In addition, knitting for your son or beloved grandson is a pleasure.
The small size of things for children allows you to quickly finish the job, and the ability to independently select bright colors and original styles for children leads to better results than store offers.
If you are knitting a baby hat, then you can give free rein to your imagination! You will be sure that your baby is reliably protected from wind and drafts with a warm and comfortable hat. From this article you will learn how to knit a light hat for a boy for spring or a warm winter one.
Children's hat with knitted ears for a boy: description and diagram
If you think that knitting a hat for a boy is difficult and impossible, then you are mistaken. The main thing is that there is a desire to please the baby with a beautiful and warm hat of an original design.

 It is better to knit a hat on circular knitting needles. Then the finished hat will not have rough seams that could rub the child’s skin.


The patterns that will help you knit a unique hat are mostly simple. It is enough to have only basic knowledge of “knitting art”.
What should you pay attention to when choosing a model and yarn for a baby hat?
- Buy yarn for knitting only from natural materials so that the child’s head does not sweat under the hat and does not cause discomfort.
- The finished product should not squeeze the head, slide or bunch up unsightly.
- If you knit a hat exclusively from wool, the baby will quickly refuse to wear it: such a hat will be very itchy. Therefore, choose wool with the addition of synthetic additives.
- Knit a hat for summer from cotton, and for autumn and winter choose wool and wool blends.
They begin to knit a hat for the child after taking measurements. Read about what measurements you need to take and what yarn to choose.


Count how many loops there are in 1 cm. Only after this can you start knitting a hat according to the chosen pattern.
Boy's hat with ears


After 6-7 rows knitted with an elastic pattern, start knitting according to the pattern until the fabric reaches 12-14 cm.
We decorate the bottom: 2 purl stitches are knitted together. After 2 rows, the decrease is repeated in the purl track.
Ears knit like this: cast on 23 loops and knit a 5 cm ribbed pattern.
Forming corners: we make 2 decreases in knit stitches on both sides each time we knit a knit row. We knit the remaining 3 loops on the knitting needles together.
Lilac hat for a boy


 Diagram and description of the children's hat “KILKENNY”

Boy's hat "Budenovka"
 Hat "Budenovka"


Video: children's hat knitted
Video: knitting a hat for a boy
Knitted hat for a boy for spring and autumn: description and diagram
A hat for spring and autumn is knitted in one thread of yarn the following types: cotton with acrylic, acrylic only, merino wool, alpaca and microfiber.


Hat knitted with a “Braid” pattern
- To knit a headdress, take a 100 g skein of thread and circular knitting needles No. 4 and No. 4.5.
- We cast on 108 stitches on needles No. 4 and close them with a ring. We constantly check that the loops are not twisted.
- Mark with a marker or pin the loop from which the first row begins.
- We knit 5 cm with an elastic pattern, alternating purl and knit stitches (2 through 2).
- Next we change the knitting needles (take half a size larger).
- We knit according to the following pattern: cast on 1 purl loop, add 1 knit stitch (pull it out from the broaches).
- We knit another 15 knit stitches and 2 purl stitches. Again we add a loop, which is formed from broaches, and knit facial loops - 15 pcs.
- Next rapport: cast on 2 purl stitches, add 16 stitches knitted in knit stitch. Repeat 3 times and complete the row with a purl loop. We got 90 loops.
Now let's start knitting the braid pattern. We will knit using the following diagram:

 Scheme of the "Braids" pattern
 - Decrease stitches using double-edged needles.
When the “braid” pattern is knitted according to the pattern, cut the thread. Now you need to pull it through the loops. - We will make a pompom using threads and cardboard circles using the standard method. All that remains is to secure it to the top of the head.

You can make a hat using this pattern knit without ears.

For an older boy, it is better to knit a different model of hat.


Knitted winter hat for a boy: diagram
In winter, the main thing for a mother is that her child does not freeze or get sick. A hat knitted by mother's or grandmother's hands will be much warmer than one bought in a store, because only the best yarn is selected for it.
Alpaca and cashmere threads are suitable for a winter knitted hat. You can combine yarn with mohair and goat down. For a boy prone to allergies, buy bulk acrylic.

Cap with a Scandinavian pattern on a soft wool lining
- We calculate the number of loops according to the volume of the head.
- We knit 7 rows from the cast-on edge with a simple elastic band.
- Add six stitches evenly and knit the main part of the hat using the stockinette stitch pattern.
After 5 rows of stockinette stitch, let's start knitting the Scandinavian pattern according to this scheme:


To make knitted patterns, take threads of the following colors:
- on the lower triangles - burgundy yarn
- for zigzags - white
- for the upper triangles - bright blue yarn color
If after knitting the pattern you still want to decorate the hat, then make another drawing of the cat. His the diagram is shown in the figure:


- After both the Scandinavian pattern and the cat are knitted, we will begin to evenly decrease six loops in each row.
- We connect the back seam using a thread of the main color.
- We tie the ears as shown in the photo: cast on 22 loops and knit 15 rows with an elastic band. At the same time, decrease 1 loop from each row.
- All that remains is to knit the lining: we will make it like a hat, but without patterns.

Video: Double cap. Knitting
Knitted children's earflap hat for a boy: description and diagram
Schemes of suitable patterns:


Video: How to knit a hat with earflaps for a boy?
And here's the continuation:
Video: How to knit a hat with earflaps for a boy using 2 knitting needles?
Knitted hat for a teenage boy: diagram
A universal hat model knitted with a zigzag pattern. How to knit it - see diagram.


 Hat pattern


 Continuation of the scheme
 Another variant hats for boys adolescence:


If you decide to knit a hat for a teenager, then take yarn in subdued colors. Will do grey colour, brown, black or blue.
According to the scheme proposed above, you can easily connect fashionable hat. The pattern is simple. Even a beginner knitter can handle it.
Other suitable patterns:


Hat for a teenager, knitted with a mesh pattern


Knitted beanie hat for a boy: knitting pattern
Have you spent a long time choosing a suitable knitted hat for a boy and settled on a beanie hat? Watch the video for details on how to knit it.
Video: Knitting. Beanie hat.
Knitted stocking hat for a boy: description and diagram
The stocking cap is now a very popular youth model. How to tie it - watch the video.
Video: Knitting. Knitting a Stocking Hat with knitting needles
Knitted hat and helmet for a boy with a detailed description
To knit a hat-helmet for a boy, stock up on 100 g of yarn and knitting needles No. 3.5. Scheme and detailed description are presented below:


Another option hats:


Cap and helmet for a boy 2-3 years old

 Hat-helmet. You can knit this hat for both a baby and a boy of 2-3 years old
Knitted children's minion hat for a boy: description and diagram
Both boys and girls like the Minion hat. Knitting it is not difficult if you are careful and repeat all the steps strictly according to the description.

The hat is crocheted. The main pattern is a double crochet. Here's the diagram:


To prevent the cap from taking the shape of a skullcap, after knitting the bottom up to 12 cm in diameter, increases should be repeated every other row.
We knit the bottom of the hat. We make a row without increments. We knit a row again with additional loops. The bottom acquires the desired diameter. Now you need to continue working to the desired depth without increments.


We knit the bottom (diameter 12cm)
After 10-11 rows we will make 2 rows with black yarn.

After the yellow rows and black, you need to knit 3 more rows with blue yarn.

Calculating the number of yellow rows


Add fabric to the desired height with blue yarn.
 Middle of the back of the hat
The middle of the back of the hat is where the rows began and ended.


Determining where the ears will be
We fold the hat in half and determine the place where we will knit the ears of the hat: it is located at a distance of 15 loops from the seam.


The outline of the cap is tied with a single crochet. The ties are 6 pieces of 100 cm each for one ear. For 2 ears - 12 pieces.

We tie the outline of the cap with a single crochet.


The ties are 6 pieces of 100 cm each for one ear. For 2 ears - 12 pieces.

 Fold two pieces in half
 Fold two pieces of the same color in half at once. We insert the loop into the outermost loop of the middle of the ear.


We pull the ends of the segments through the loop. We repeat the same action with the remaining segments.
![]()
![]()
Eye glasses: diagram
- For knitting the 1st row, use a brown thread.
- To knit 2 rows you will need white yarn. Knit in the back half loop.
- For row 3, white yarn is used.
- The black stripe is a guide for sewing on the eyes.

 How to knit eyes
You can knit this hat literally in the evening. If you need something unusual and simple for your son or granddaughter, then knit a light hat for autumn or spring. The pattern consists of knit and purl stitches, which are combined in different ways.
Instructions for the hat are given for sizes 46-48. For knitting you will need 80 g of 100% merino wool and knitting needles No. 4.
We cast on 74 loops. We close the loops in a circle and knit 5 rows with a simple elastic band, alternating 1 front and 1 purl loops.
We begin to knit a pattern of knit and purl stitches: after the elastic, we knit a row of knit stitches.
We knit the second row after the elastic using purl stitches.
Next we knit 5 rows with facial loops.
After this - a series of purl loops.
We knit the next row with facial loops.
Again we knit 4 rows with an elastic band, alternating 1 knit stitch and 1 purl stitch.
Repeat the pattern 2 more times.
We knit a row with facial loops and decrease 6 loops in a row.
There should be 20 loops left on the knitting needles, which need to be tied together with thread.

Below are the original ideas knitted hats for boys:


Gray hat for a boy with thermal “car” stickers
For the hat you will need three colors of yarn and thermal stickers. The stripe on the cap is the road. The automotive theme is complemented by cars.


You can choose other stickers: cartoon characters, or robots. The strip can be knitted with brown or yellow yarn, then the strip will imitate a path. The hat is knitted using regular stockinette stitch.
Knitting pattern for a hat:


Knitted hat and scarf for a boy: diagram
Gray hat and scarf with snowflake
Children's hat with visor with ties
- We start knitting in garter stitch from the middle strip: this is a strip running from the forehead to the neck.
- Add loops along the edges, knitting squares, while simultaneously removing two loops along the diagonal.
- How to knit squares? Cast on the required number of loops and decrease in the middle, removing two loops unknitted at once: cast on 1 knit stitch and throw two over the knitted one.
- We decrease in each row until we knit a square.
- We decorate the bottom of the hat with an elastic band.
- We knit the visor and strings separately and sew them to the finished hat. The visor is knitted in double stitch, starting from the front edge.
- You can knit such a hat in one piece so that you don’t have to sew on the parts separately.


Video: Children's hat with ears and ties
Knitting a hat with earflaps using photo and video master class
Knitting a hat with earflaps using photo and video master class
Today, knitted hats with earflaps have become extremely popular. Almost everyone likes them, so women and men wear them with pleasure. Many needlewomen want to know how to knit female and male patterns correctly. But mothers are interested in how to knit a fashionable and warm earflap hat for a little boy or teenage girl. Knitting any of the patterns will not seem too difficult even for beginner needlewomen.
To make any master class on making this type of hat, you will need yarn and knitting needles, as well as diagrams and photos. In addition, you need a little time and a lot of desire to successfully knit any model. Now we will show you the first master class with step-by-step photos. 


Master class on knitting a simple pattern
Unlike the above photo, in which you see a hat with earflaps knitted with the “Rice” pattern, the knitting of the model in this master class will be done in garter stitch. 

This is a men's model, because it is somewhat rough and very simple, without unnecessary reliefs. Before starting knitting, this master class asks you to measure the circumference of your head, which in our case was fifty-five centimeters (cm). For one ear you need to cast on eight units, after which we begin to knit with garter stitch. During the knitting process, we add two loops in each row, at the beginning and at the end of the row (P). Having reached twenty-two units, we will continue knitting with garter stitch without additions, until the length of the ears is twenty cm. At the same time, their width is twelve cm. 

In total, we will need to have on the knitting needles the number of Ps, which includes thirty-nine pieces for the front, forty-four Ps for two ears, and thirty-six pieces for the back of the head. There will be a total of one hundred and nineteen units on the knitting needles. First, we cast on half of the rear P, that is, eighteen pieces, then the side loops, then thirty-nine front units, loops of the second ear, and eighteen pieces of the back part. When all these Ps are together on the knitting needle, we knit five rows of them with the main pattern. After this, we will create the desired depth of the earflap hat, that is, fifteen cm. In the upper part, we need to knit a noticeable narrowing of the fabric. The pattern of this narrowing consists of knitting one of the two Ps along the edges of the product in the first row. In the next P we will subtract eight pieces. After completing ten R's we should have fifteen loops that need to be tightened together. The last thing we knit is the lapel of the earflap hat. In front, we cast on thirty-nine loops along the outer row, and use the main pattern to make the desired lapel length. You can knit small curves to improve its appearance. To do this, we knit two Ps together in each row. We make such decreases in the next five rows. 
Knitted women's hat with earflaps
The master class shows models of hats for women. In it you will see some photos of models, as well as a video tutorial. Pay attention to the photo, which shows a very fashionable women's hat with earflaps, knitted with ordinary knitting needles. 
The principle of needlework and the scheme of work are preserved almost exactly as in the manufacture of the male version. In addition, the men's, women's or children's model is very similar because they all have ears and a lapel. Therefore, each of them is performed approximately according to the same scheme. The only differences are the patterns. Among other things, models differ in the presence or absence of decorations. Among them, we note beautiful crocheted flowers, as in the photo below. 
You can also decorate the finished product with original buttons or a brooch. 

Video master class demonstrates knitting patterns for women. It contains a description of the basic “Star” pattern, which was used for the women’s earflap hat. It will require a set of loops that are a multiple of three, plus 1 and plus two edge loops. The vertical repeat of the pattern is four rows. For work, we will prepare two hundred grams of yarn and knitting needles number three. The knitting density is twenty loops in ten centimeters. For each ear we will dial six units, and make additions in the front rows, one on each edge. When the number of P reaches twenty pieces, we knit a length of seventeen cm. After that, we will make a complete set for the entire hat. The first seventeen pieces of the set are intended for half of the back of the head. Then there are the loops of the first ear, thirty-seven units of the anterior zone, the second ear and half of the back of the head. In total there were one hundred and eleven pieces on the knitting needles. Then you need to knit all the loops together using garter stitch, making four lines. After this, we begin the main pattern of the earflap hat. We knit a depth of twelve cm, required for a hat with earflaps, after which we need to knit its upper part, gradually decreasing the loops. Next comes the making of the lapel, for which we collect thirty-five units at the bottom of the forehead area. After casting on, we knit a lapel of the desired length and bind off all the loops. When finishing the needlework, we cut pieces of thread for the fringe, shape it and fasten it at the bottom of the ears. This completes the master class, and the knitted women's earflap hat is completely ready.
Video: Tutorial on knitting a hat with earflaps
How to knit a hat with earflaps for a boy
Now we will look at how to knit
earflaps. This earflap hat is more intended for a boy, but this is not at all necessary. The earflap hat has a double layer of knitting on the sides. In addition, it has fabric insulation, hemmed on the reverse side. It is suitable for the coldest time of the year. The product is decorated with white trim on the lapel and along the edges of the ears. The white trim looks great against the vibrant blue. For needlework you will need two types of mixed yarn, smooth colored and twisted for the lapel and tying the ears. The head circumference in this case is forty-eight centimeters. We carry out the work with knitting needles number five. The knitting technique for this model of a hat with earflaps for a boy differs from the methods that we discussed in previous lessons. To knit the first element, you need to cast on twenty-two loops, and knit a thirty-six cm rectangular fabric with the Arana pattern. 
The width of the rectangle is twelve cm. This detail will become the central zone of a boy’s earflap hat, that is, it will form the part of the hat between the forehead and the back of the head. After this, in the center of the fabric we will pick up twelve new units from the edge loops and begin to knit the first ear of the hat. The pattern is the same as in the first part, that is, “Arana”. We knit eighteen cm straight, after which we add a loop on both sides. Next we knit seven cm out of fourteen loops. After this, reduce the loops to eight, and close the row. Now from the last closed P we take the first P of the second layer, and knit everything in a mirror image to make a double fabric. We knit the second ear of the earflap hat in the same way as the first. We fold the parts and carefully sew the hat together. Now all we have to do is tie it with textured yarn using a crochet hook. In the forehead area we crochet the visor using the same textured thread. A boy's earflap hat is decorated with plaits with pompoms. The harnesses are knitted using three knit stitches and sewn to the ears and visor. When you have finished all the binding and made the visor, the hat for the boy can be considered ready.
Video: Knitting a hat for my son with knitting needles
Photo master classes


Comments
Related posts:
 Knitting socks and slippers from photo and video master class